Overview
Airtime X is a customisable cloud solution for music and content research. It is custom designed to report, sort, categorise, and assign music results, all within your browser. All song data, history, and trending are stored securely, and can be viewed directly from any device.
Airtime X lets you slice demographics and visualise perceptual results in real-time. Changing your target? No problem! Create filters based on any question across multiple surveys. There’s no limit to the combination of questions and responses that can be used to build a filter.
Airtime X is fully web-based, so you can easily share and collaborate with your team. Nothing to download, nothing to install, just complete control of your data whenever and wherever you need it.
Getting access to Airtime X
The quick way
Fill out the access form.
Receive Confirmation and Welcome email.
Set your password.
Log in.
A little more detail
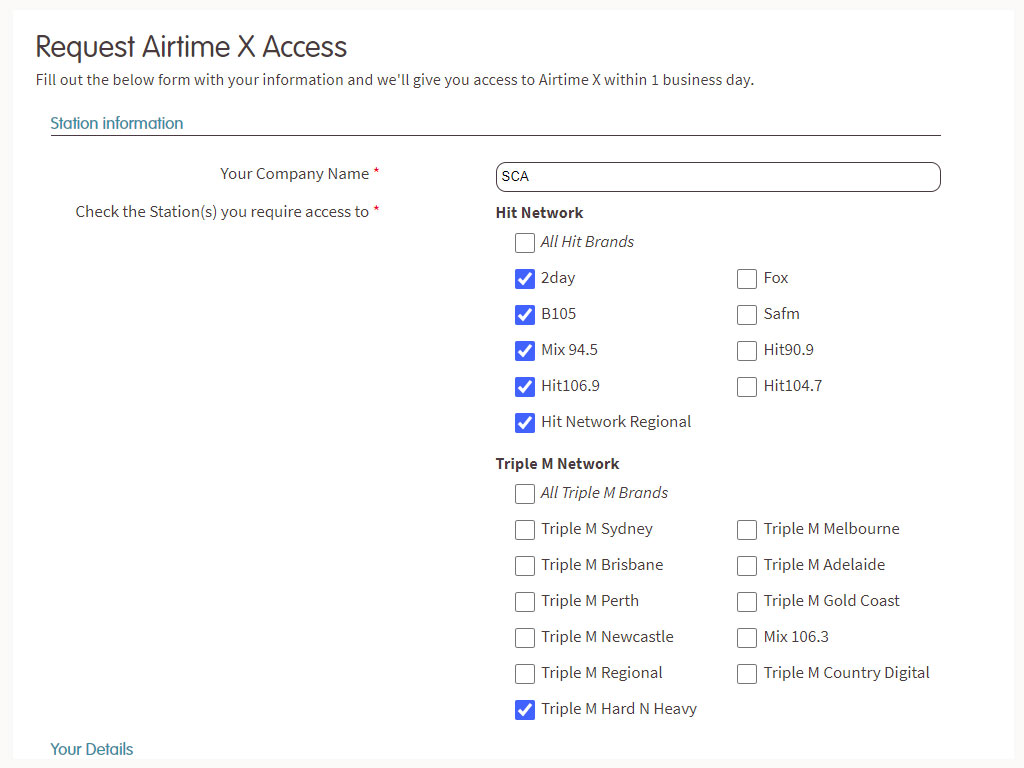
Simply fill out the Airtime X Access Form with your details, the station(s) you require access to and select submit.
You will receive a confirmation email within x1 business day. All accounts need to be approved by Airtime X Admin before you're granted access.
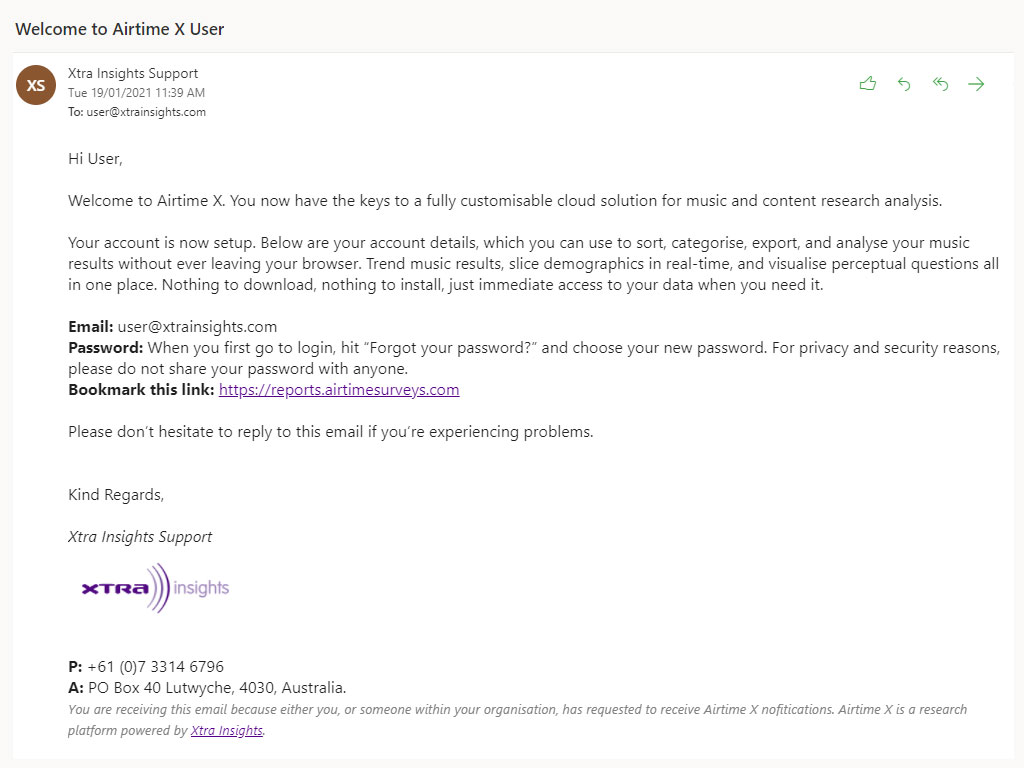
Once approved, you will receive a Welcome To Airtime X email. Follow the instructions in the email to reset your password.
Use your username and password to log in to Airtime X.
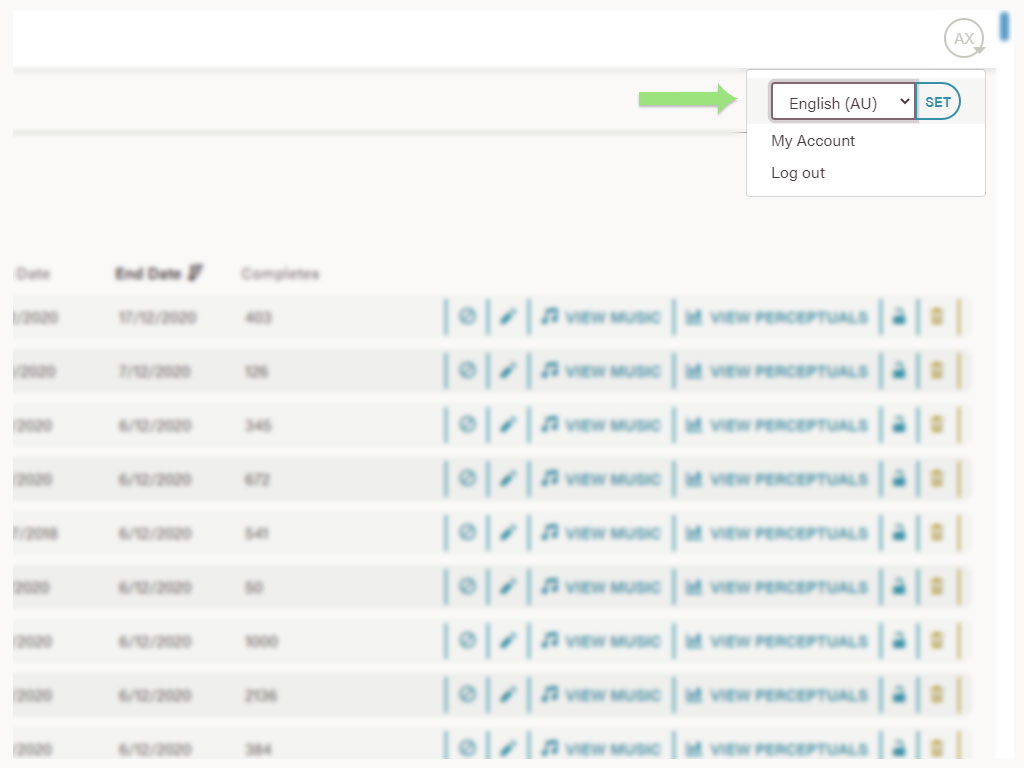
You can change your language preferences from the dropdown in the top right corner.
Receiving results for the first time
The quick way
Receive Airtime X results notification in your inbox.
Login to Airtime X.
View the music or perceptual results for your selected station(s).
A little more detail
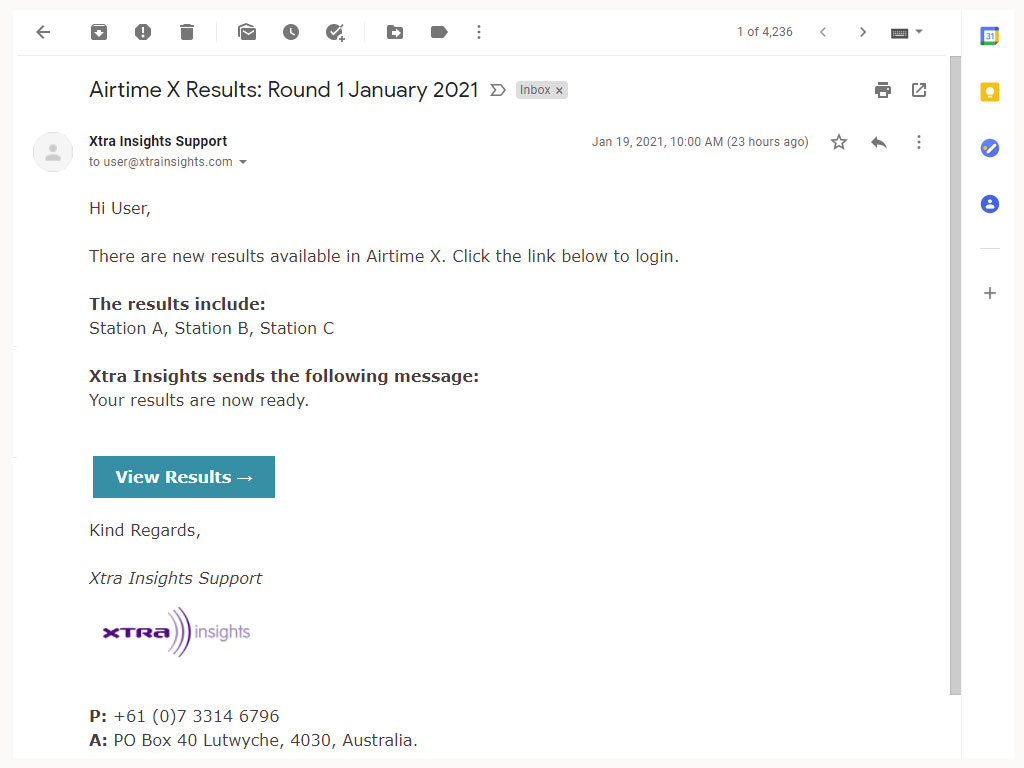
When your survey results have been processed and released, you will be sent a notification email. This email includes the latest survey information and a link to log in.
You can also securely log in using your email and password anytime you wish.
If you've already set up your account (see Getting access to Airtime X), select the button to View Results. If you're still logged in from your previous session you will see the Summary page. Otherwise, enter your email and password on the log in screen.
On the Summary page you will see the latest survey results for your stations(s).
To view the latest music results, select VIEW MUSIC for your station.

Alternatively, use the left hand navigation to select Surveys to see a complete list of all your stations' surveys.
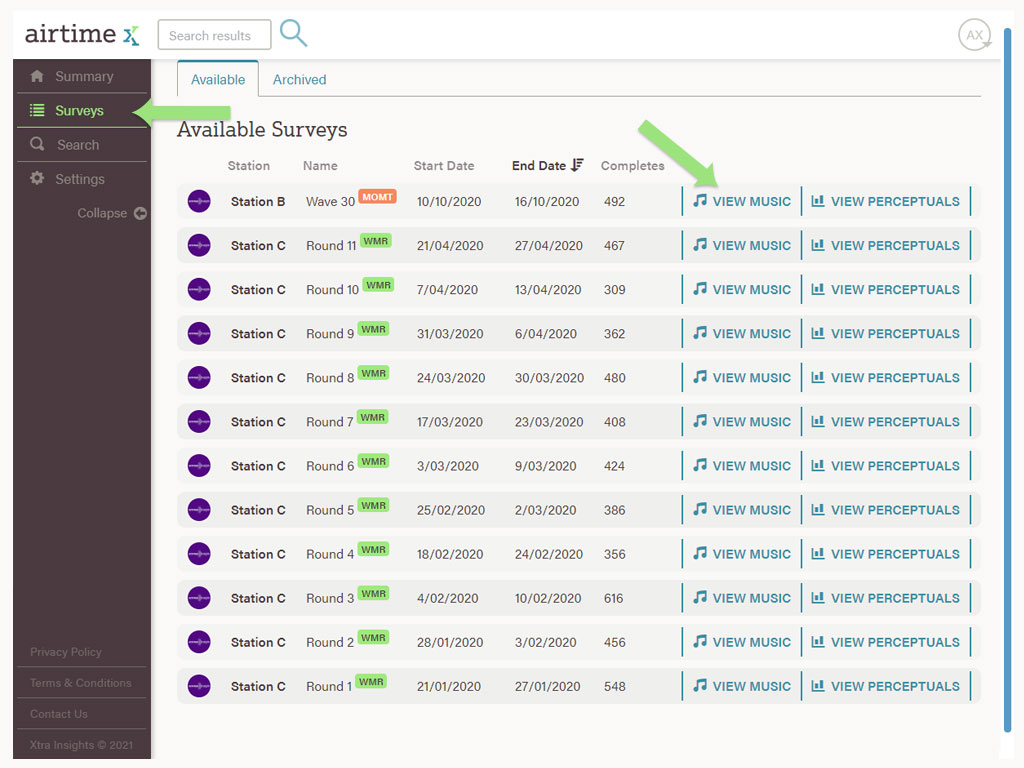
To view the latest perceptual results, select View Questions from either the Summary page or the Surveys page.
The Music Report
Navigating the music report
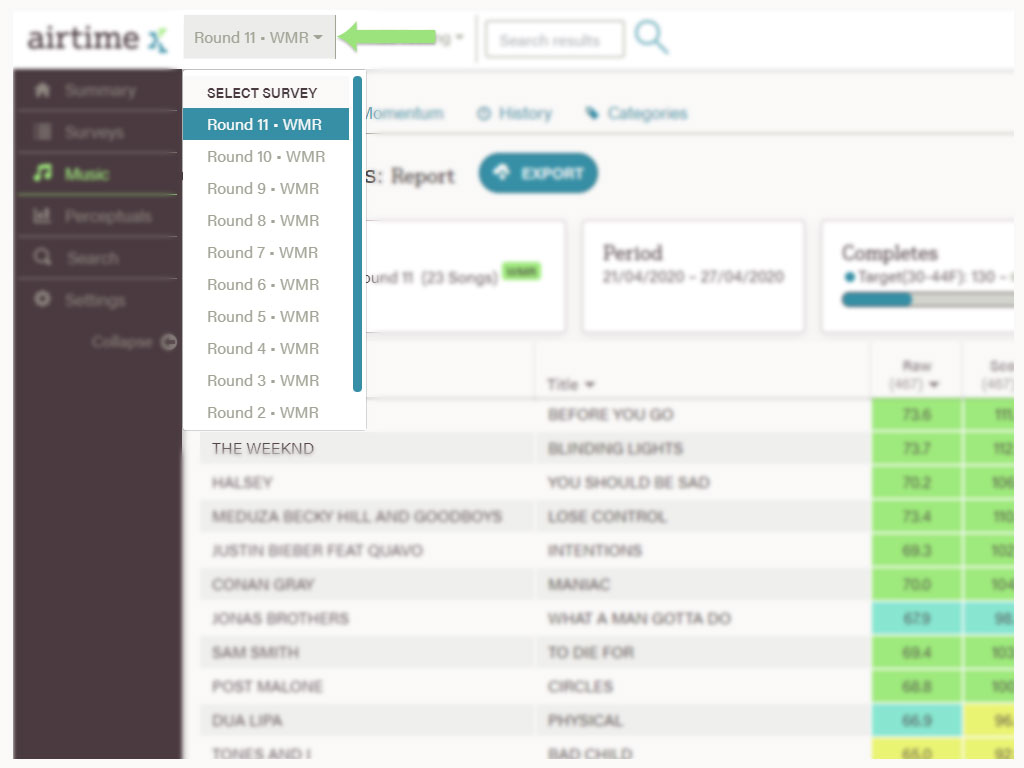
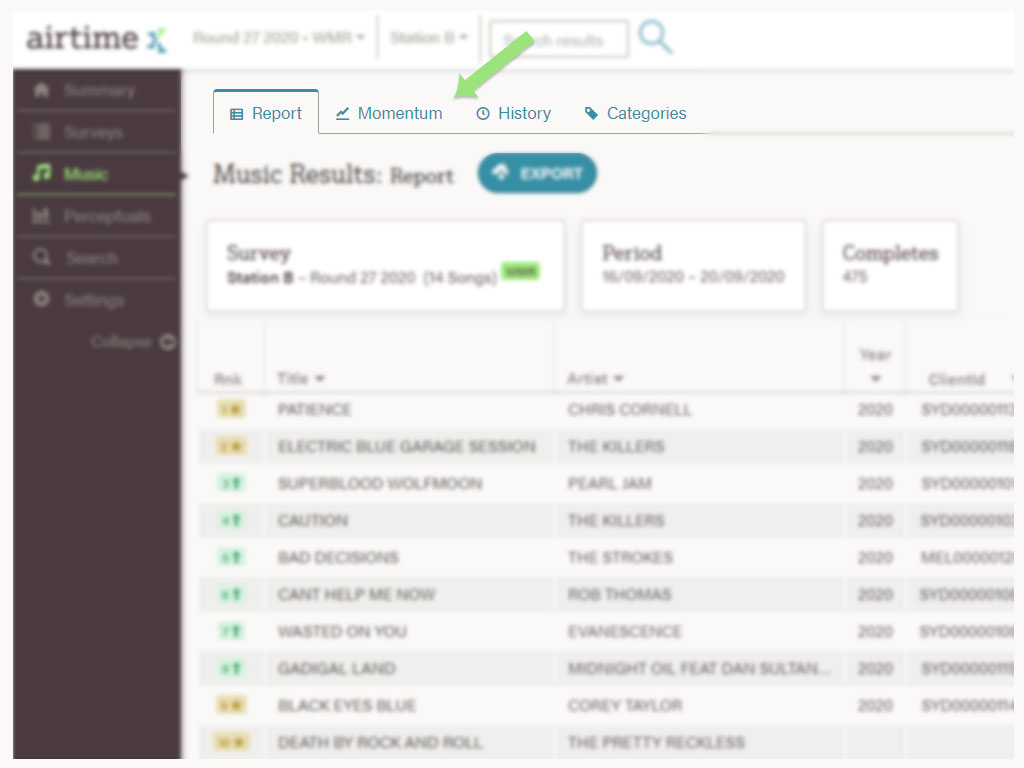
Located at the very top of the Music Report page, you will find important navigational features.
The first dropdown can be used to control the selected survey. Unless otherwise selected, you will always see the latest survey by default. The Select Survey dropdown includes all processed Available Surveys. You cannot view Archived Surveys from this list (see How to view historical data).
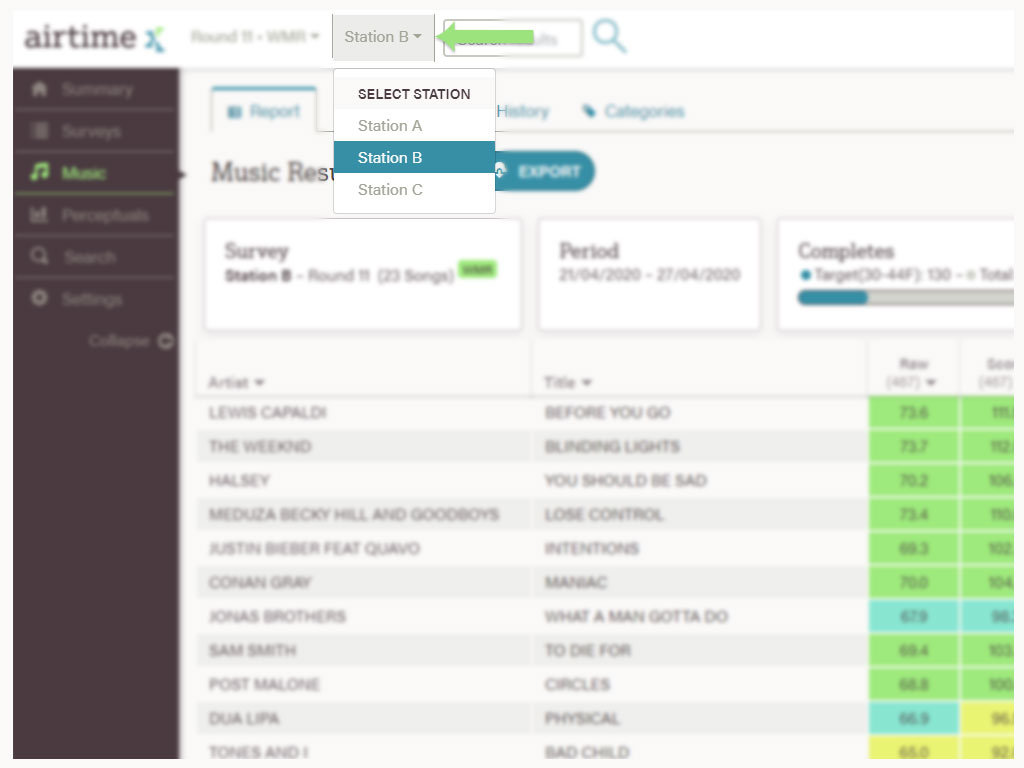
You can also change your current Selected Station at any time by using the dropdown to the right of Select Survey. You can only access the stations that you have permission to view.
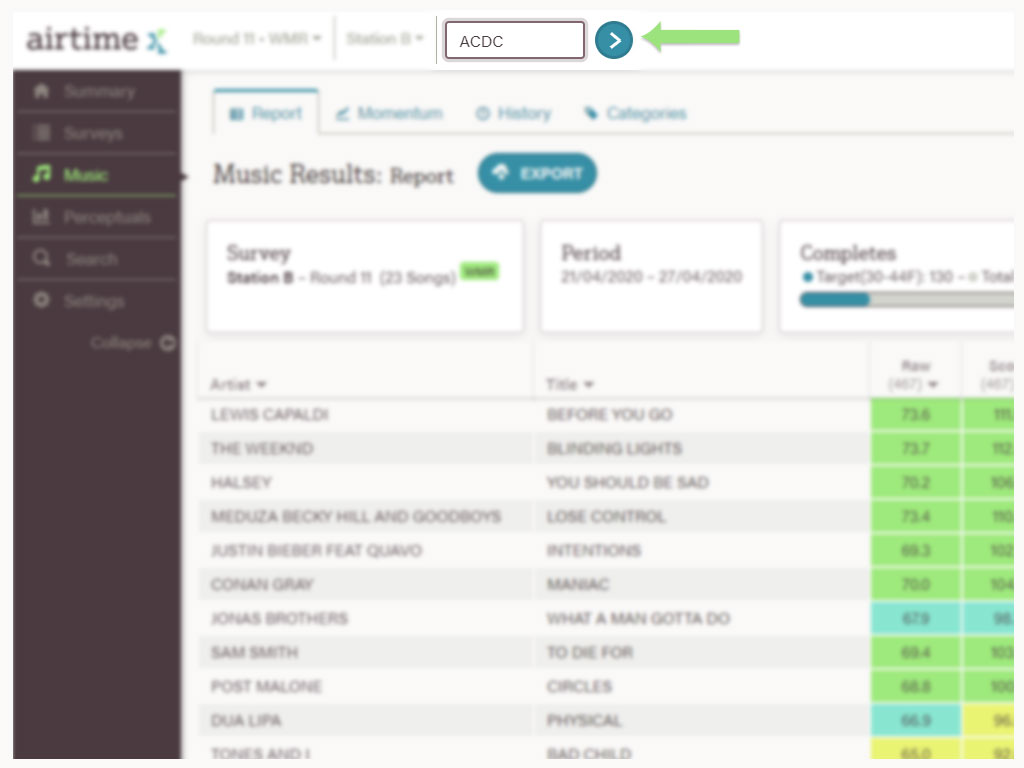
Use the Search bar to the right of Select Station to search for specific Song Title or Artist results in any survey (see Searching Airtime X).
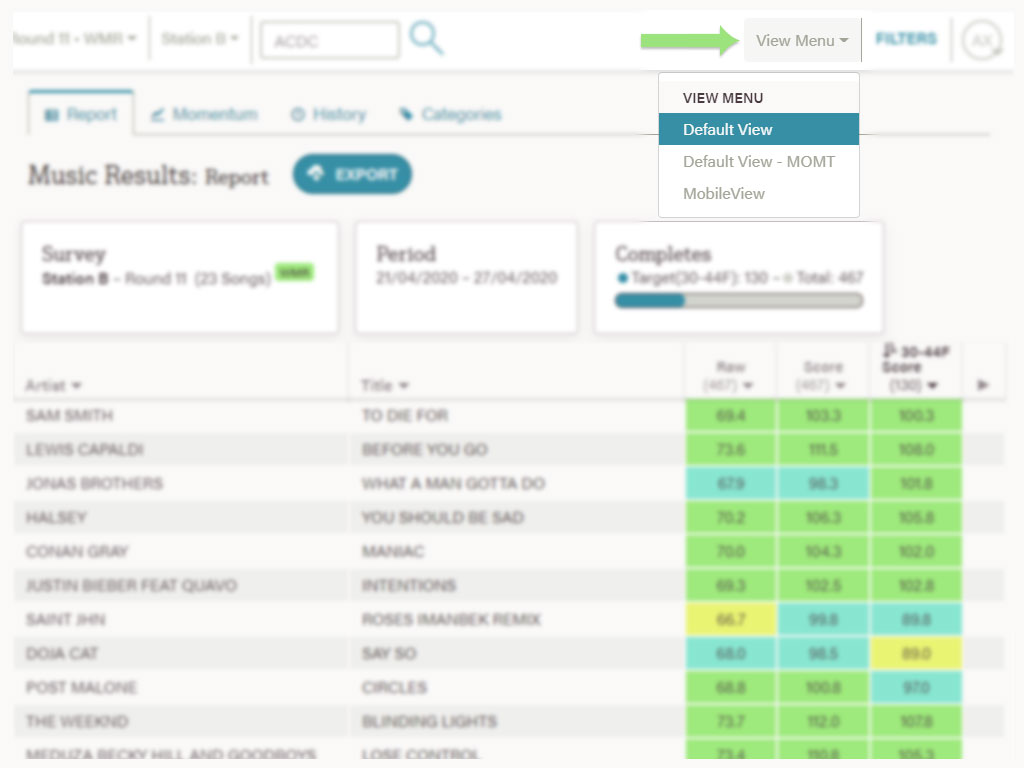
On the right of the top navigation is the View Menu (see How to change your report view for more information).
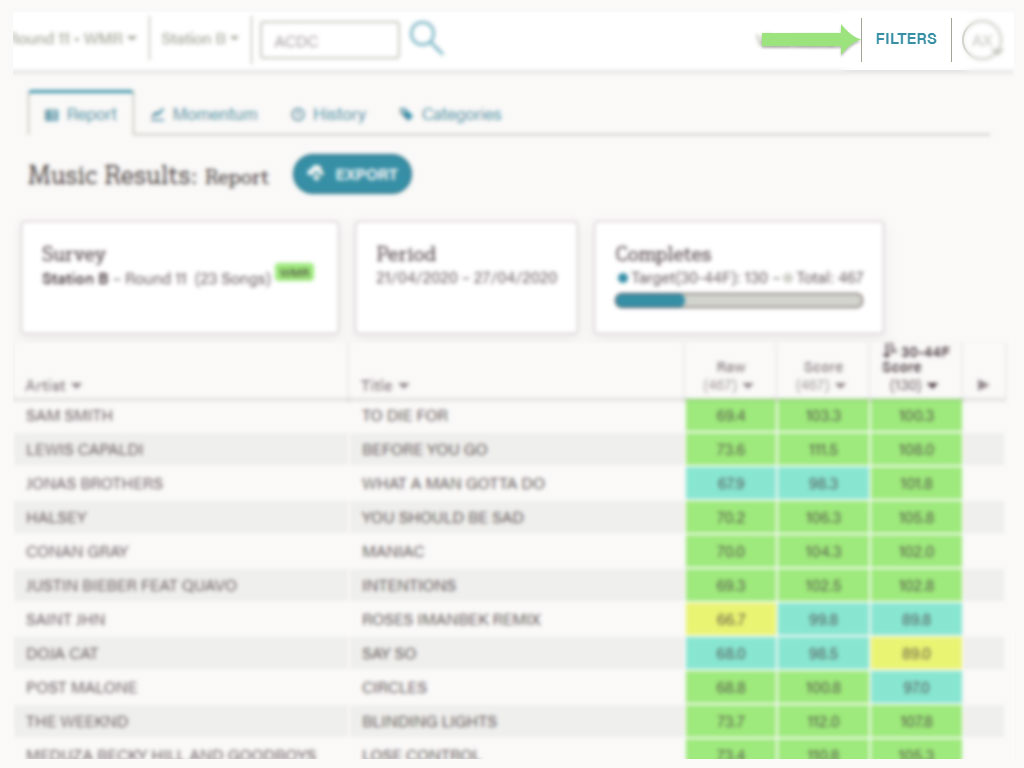
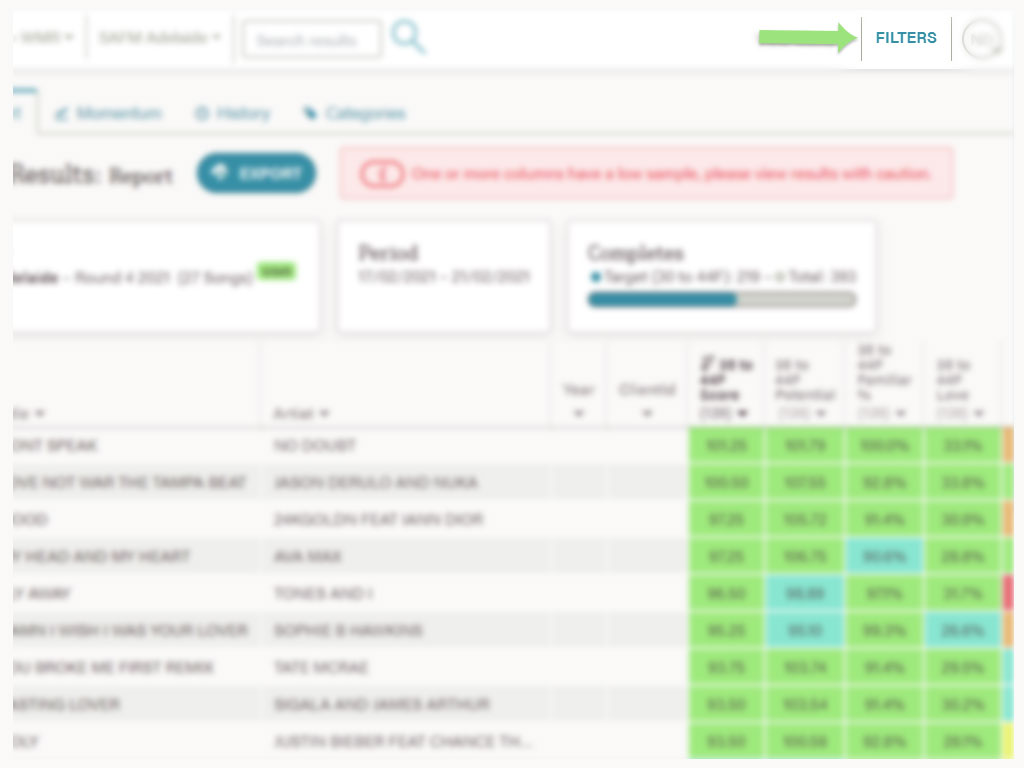
Next to that is the Filters button, which will take you to the Settings section. On the Filters page, you can see the criteria for each filter available for your station. See Glossary for more information on Filters and how they affect Columns and Report View.
Understanding the report
From the Music Report page, you will see a table using the default report view (See How to change your report view for more information).
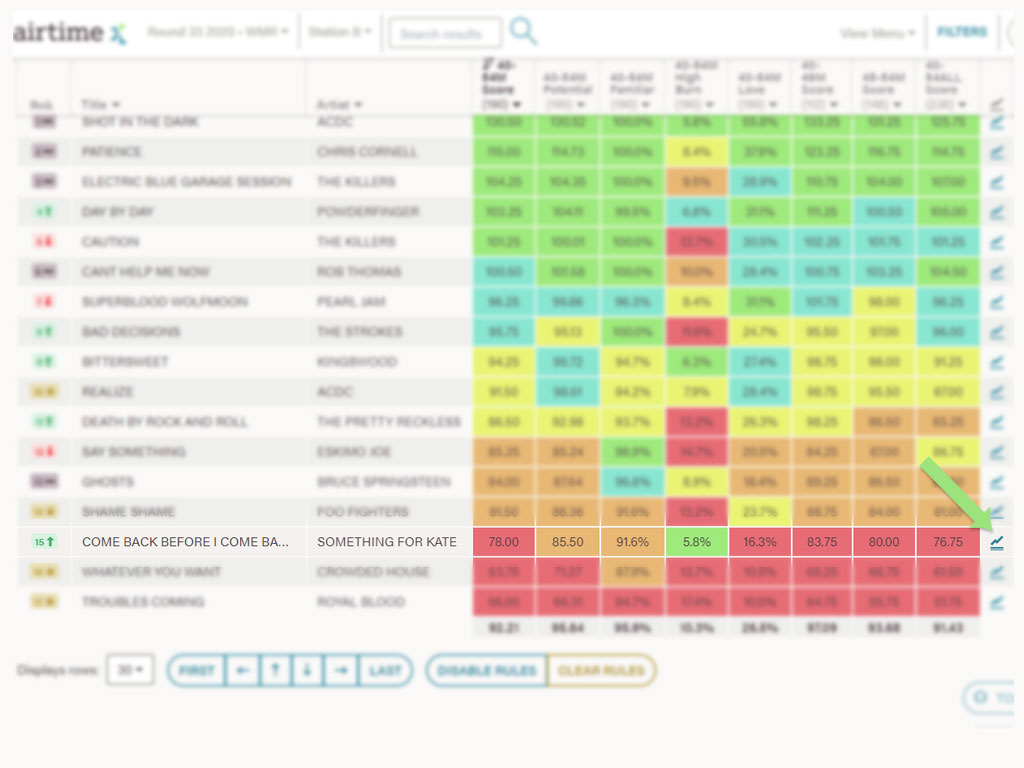
The report view is made up of multiple columns. See Glossary for a detailed breakdown of each column type.
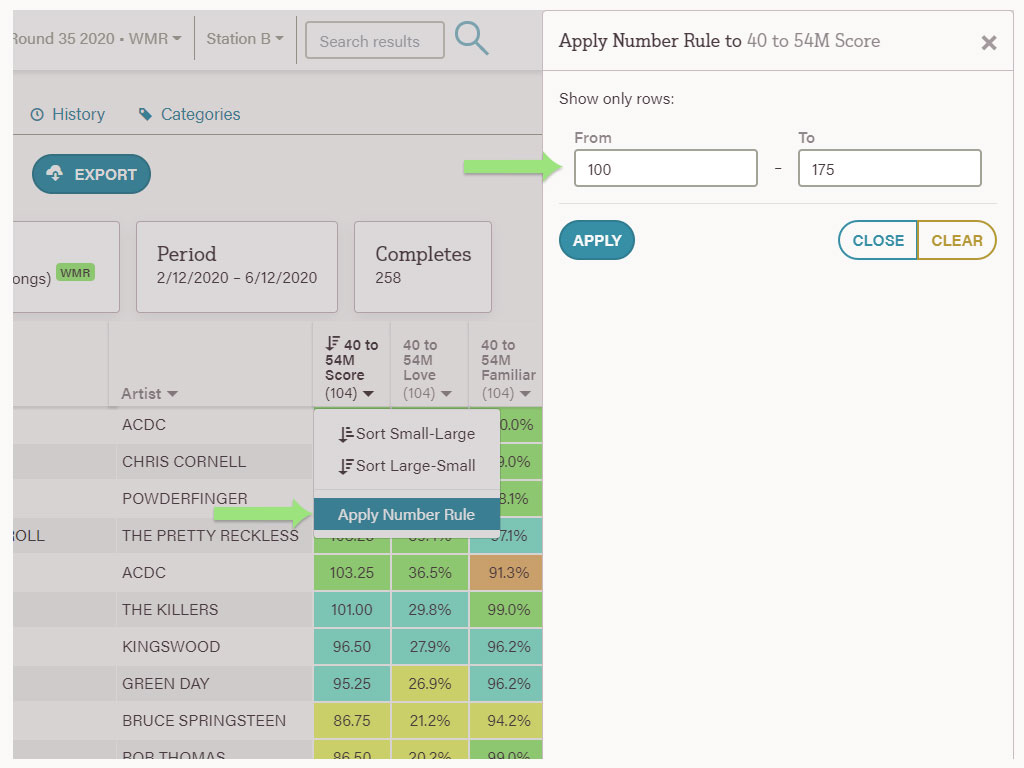
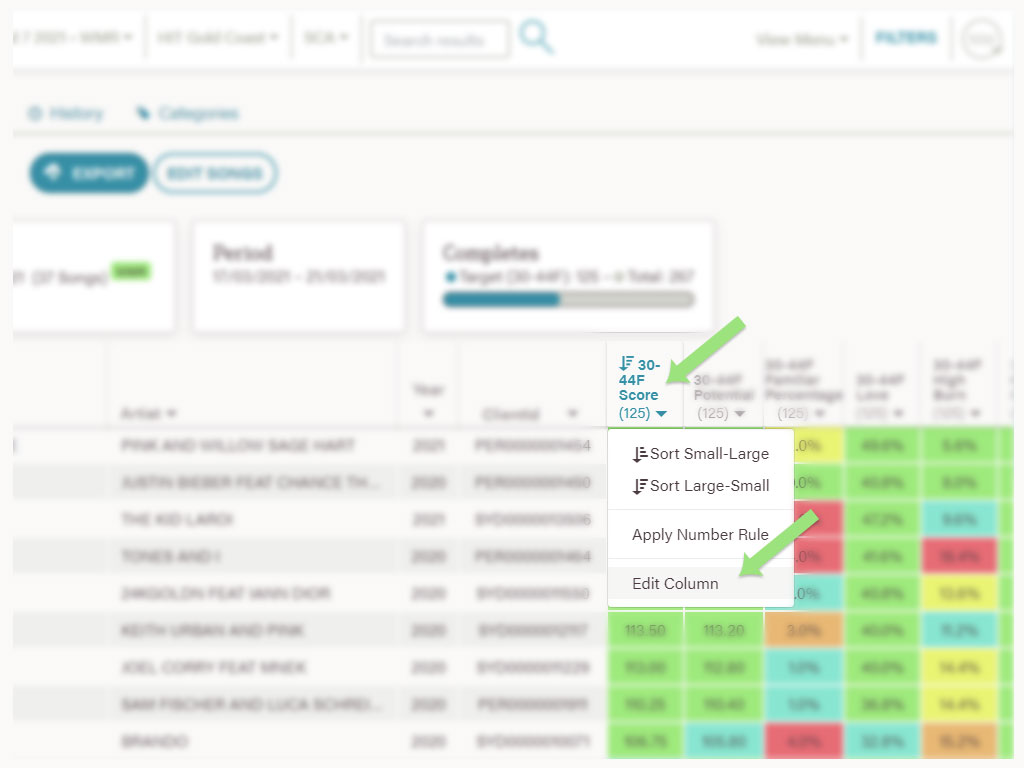
Your default report view is automatically sorted by your target filter (see Glossary). To change the sort order, select the dropdown from the column header and choose the sort direction.
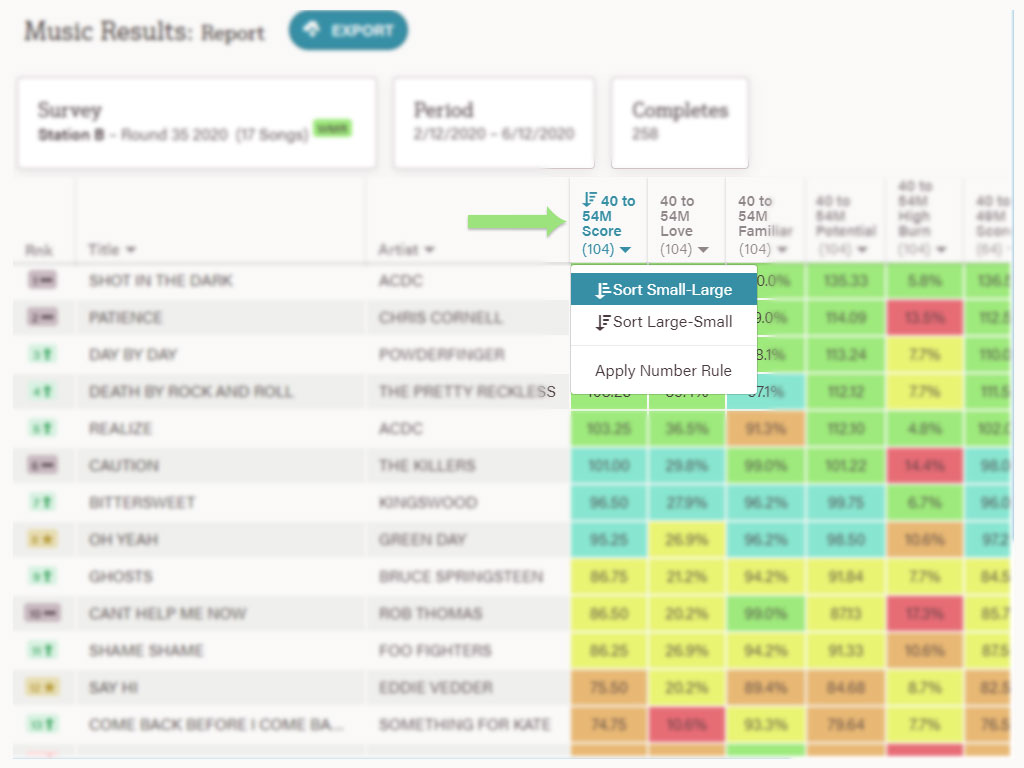
You can further analyse the data by applying column rules from the same dropdown. See Glossary for further explanation and use.
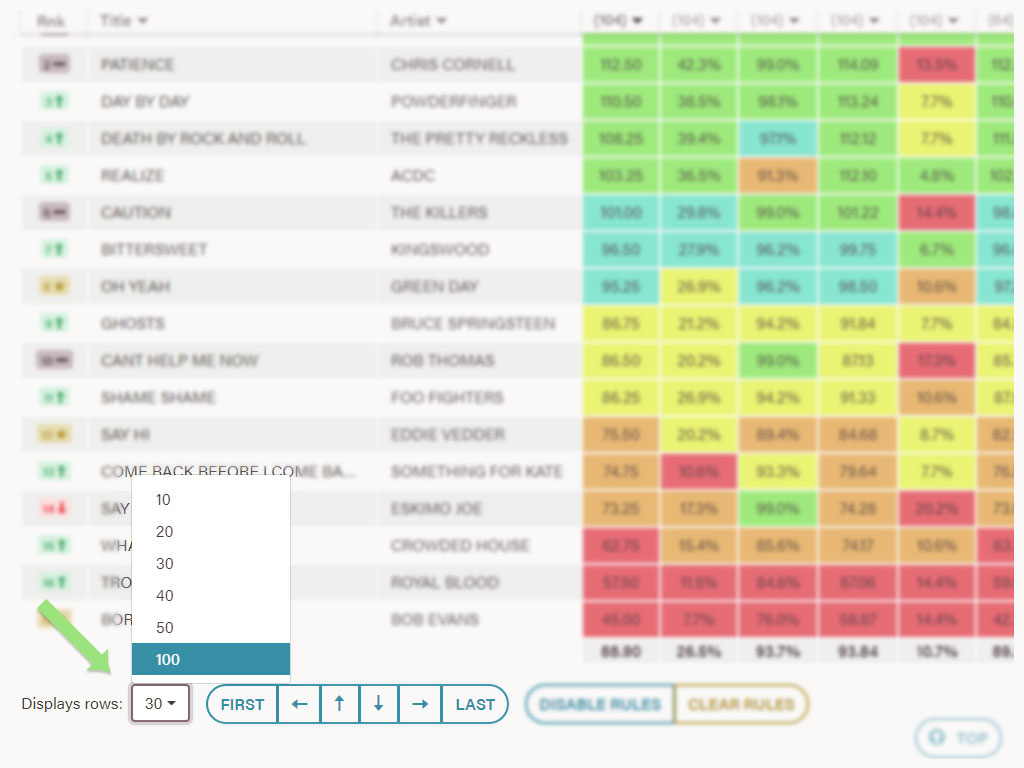
There are pagination controls at the bottom of the table.
- You can control how many songs are visible on the page. The default is 30 rows and is limited to 100 on a page.
- If you have more songs, use the arrows or First and Last buttons to see more results.
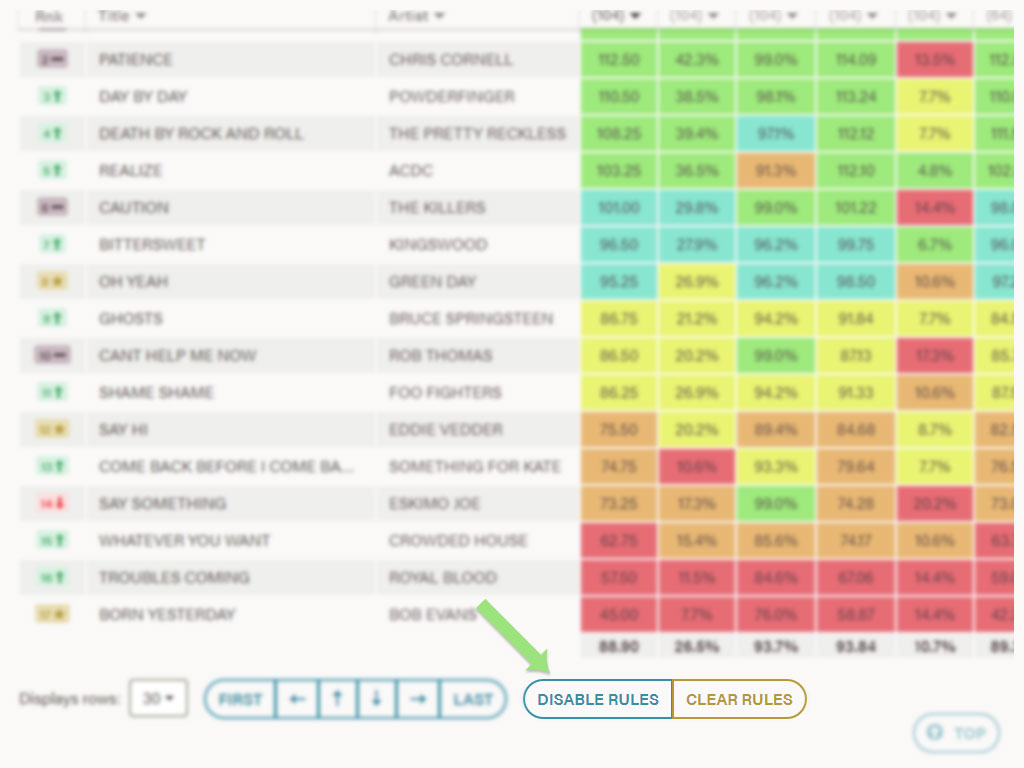
The Disable Rules and Clear Rules control rules applied to all columns. See Glossary for further explanation.
How to change your report view
The default report view that you see upon loading the Music Report page places the columns in the order provided to Xtra Insights at the time of setting up your station. There are three default view options:
- Default View: Best used for WMR surveys (see Glossary)
- Default View - MOMT: Best used for MOMTs (see Glossary)
- MobileView: Best used when viewing results on small screens
Use the View Menu dropdown at the top right of the page (before Filters button) to change the report view.
All report views are visible to all users who have access to that station. Each view is specific to a station, so Station A cannot use Station B's default view.
Editing your report view
You need to be a Client before you can create and edit report views (see User Roles for more information).
To add a column to an existing view, on the Music Report page select View Menu in the top right hand corner, then Add Column.
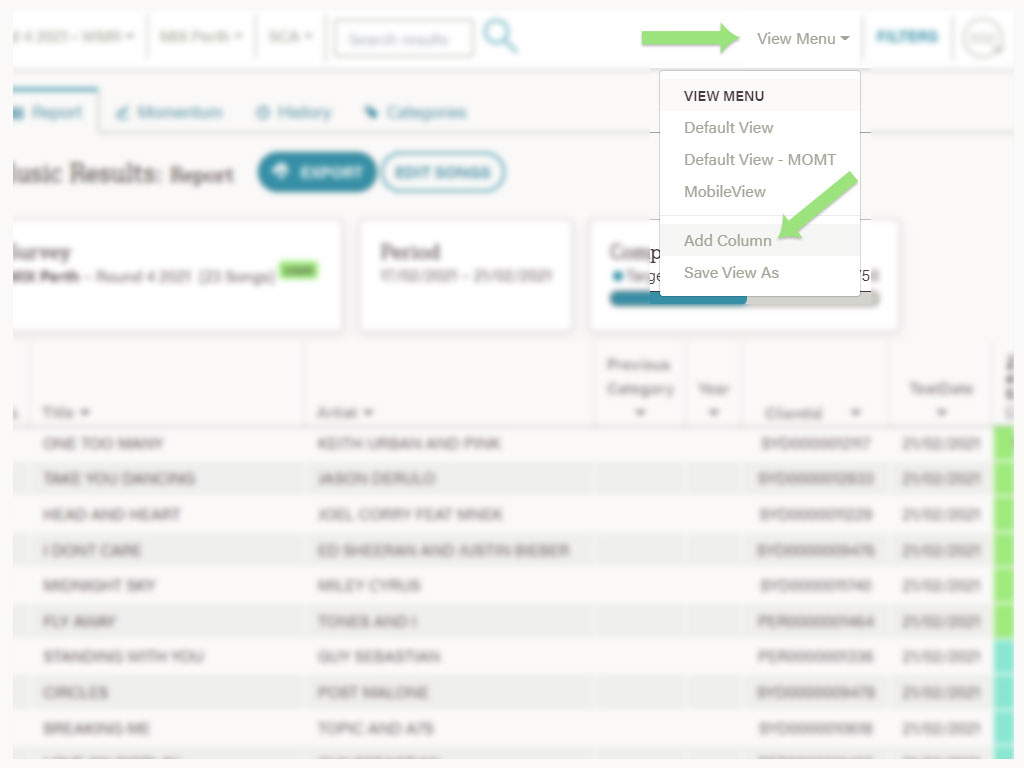
First, select your Column Type, you have two choices: Song Attributes or Dynamic. For more information on column types, check out the Glossary. To build a Dynamic column, select any option after Song Attributes, for example Score.
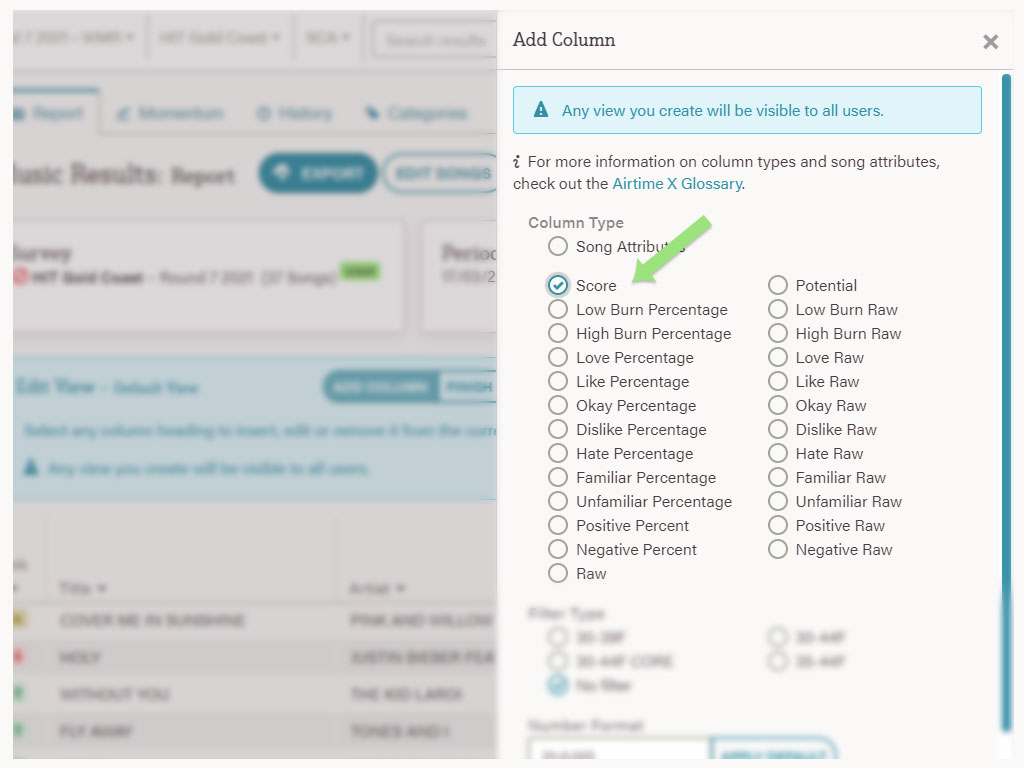
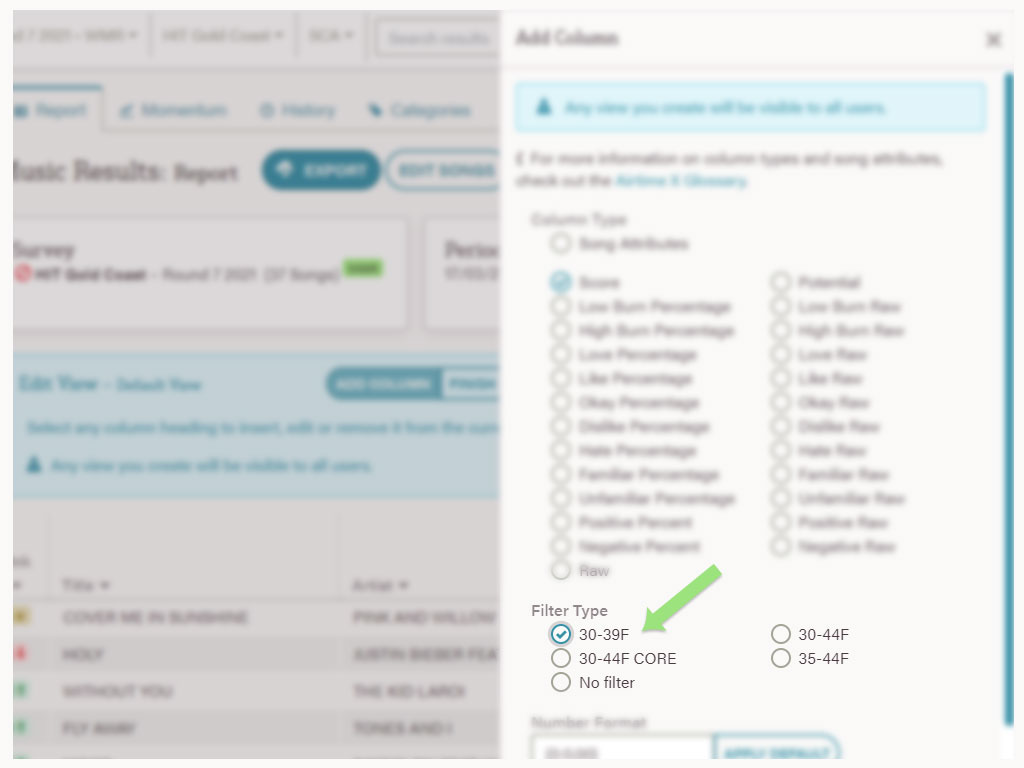
Secondly, select a Filter Type from the list. Some Filters may already exist, if not, see Understanding Filters for more information.
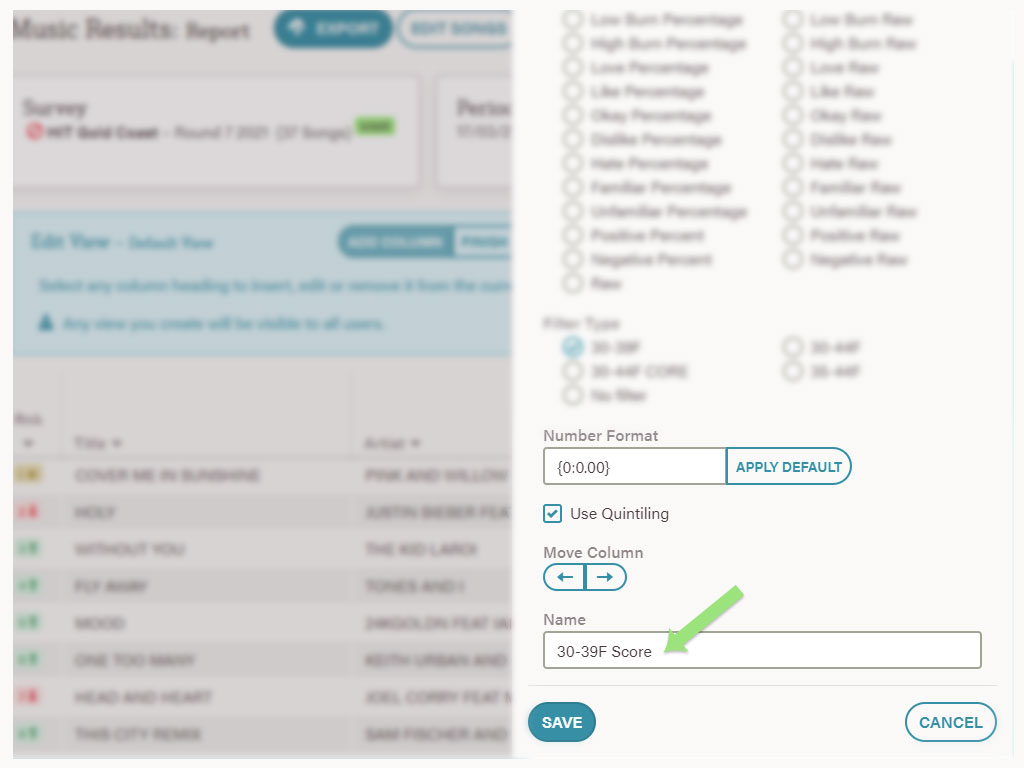
You can leave Number Format and Use Quintiling as the default values, otherwise, check out the Glossary to learn more.
By default, new columns will be added to the end of your view. You can move a column position by using the Move Column buttons.
Lastly, a column Name will be generated based on your Column Type and Filter Type selections. You can change the name before hitting Save. NB: You cannot create a new column if one with the same name already exists.
To edit an existing column, click on the column header in the table and select Edit Column. Follow the same steps as adding a column above.
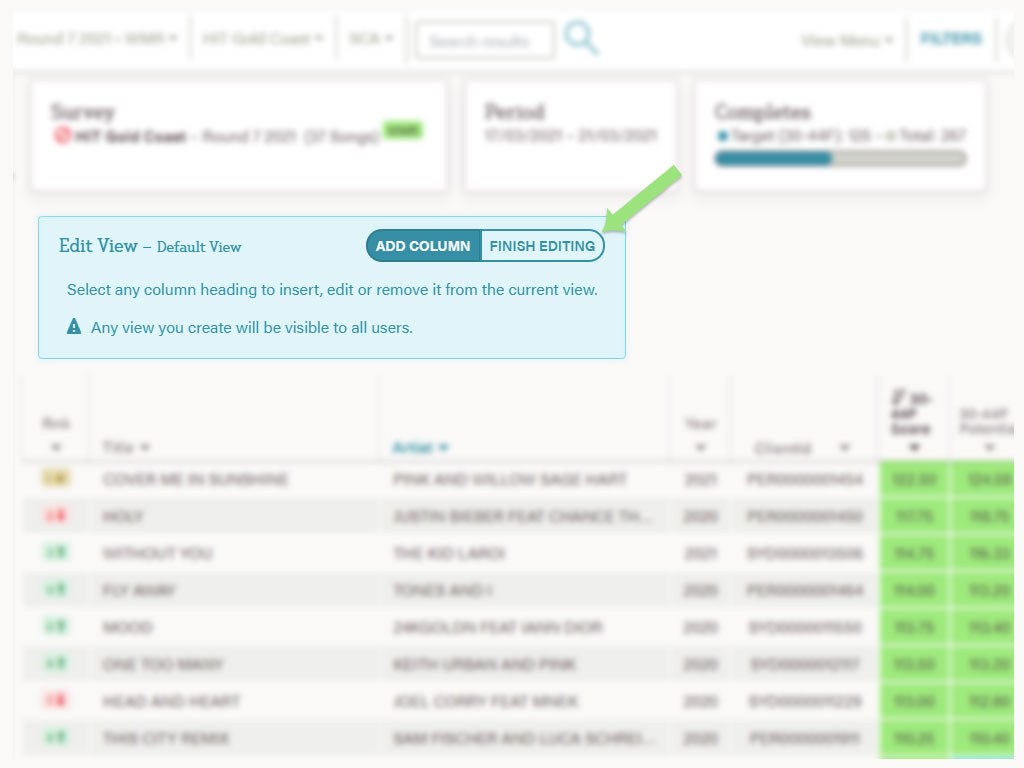
Upon adding or editing a column, you have activated Edit Mode. You can add more columns, move columns, edit or delete columns and insert new columns before an existing one.
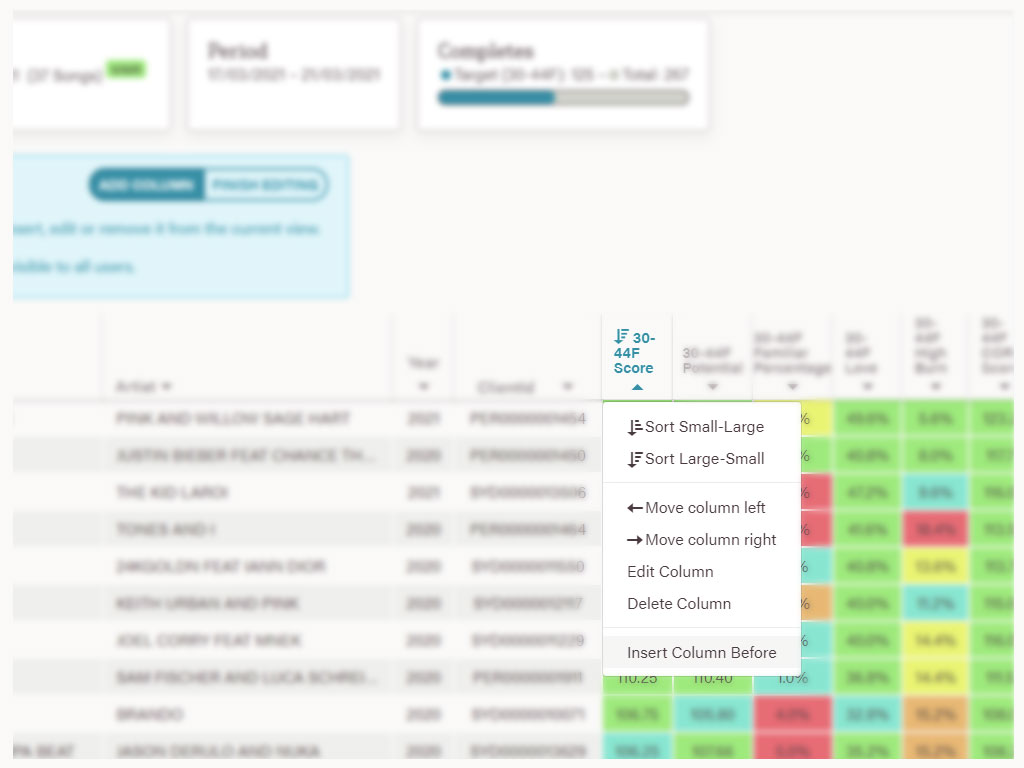
Select Finish Editing, or navigate to another page, to cancel Edit Mode. NB: All changes you make to a view are saved immediately and visible to all users.
Some views may be locked and you cannot make changes. Only Importers have the ability to edit a locked view (see User Roles). You can see which views are locked from the View Menu.
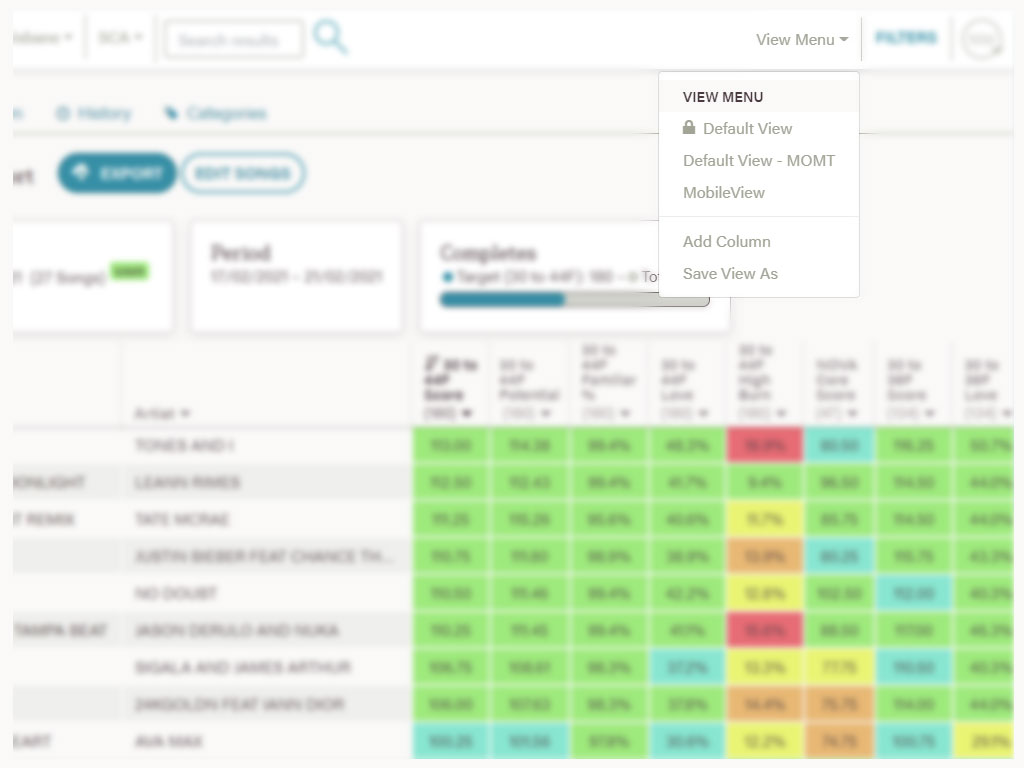
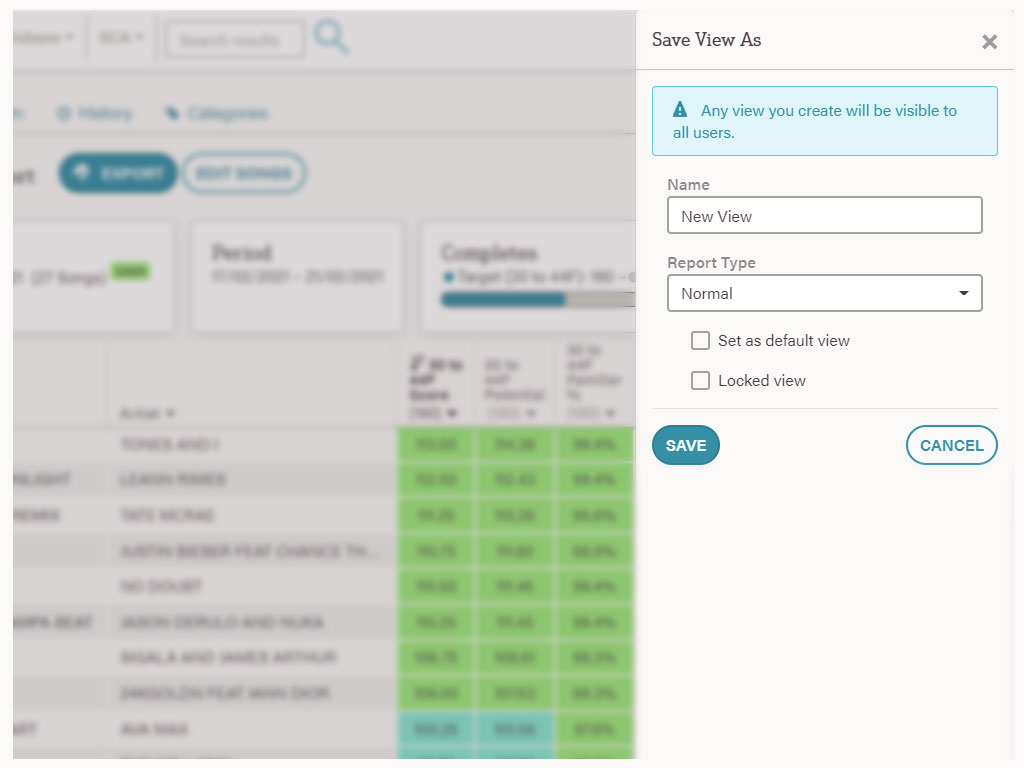
To create a new view select View Menu, then Save View As. Provide a new view Name to save your changes.
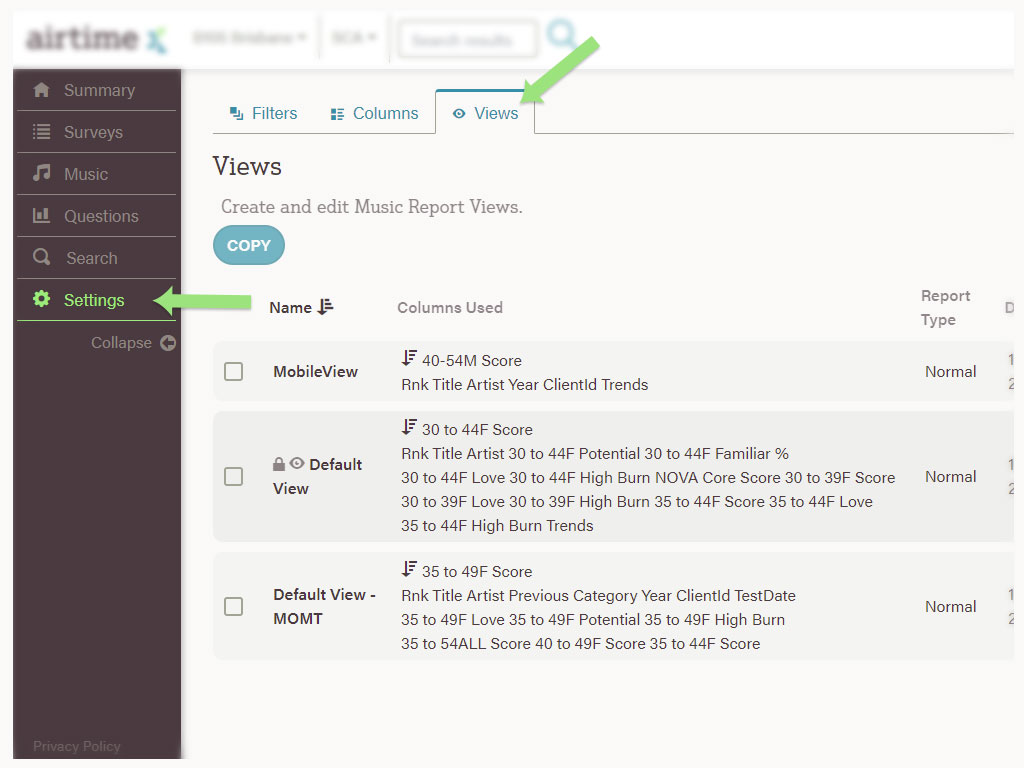
You can copy, edit and delete all views for a station by selecting Settings from the left hand navigation, then Views from the top menu (see Understanding Views).
Exporting music results
From the Music Report page select the Export button.
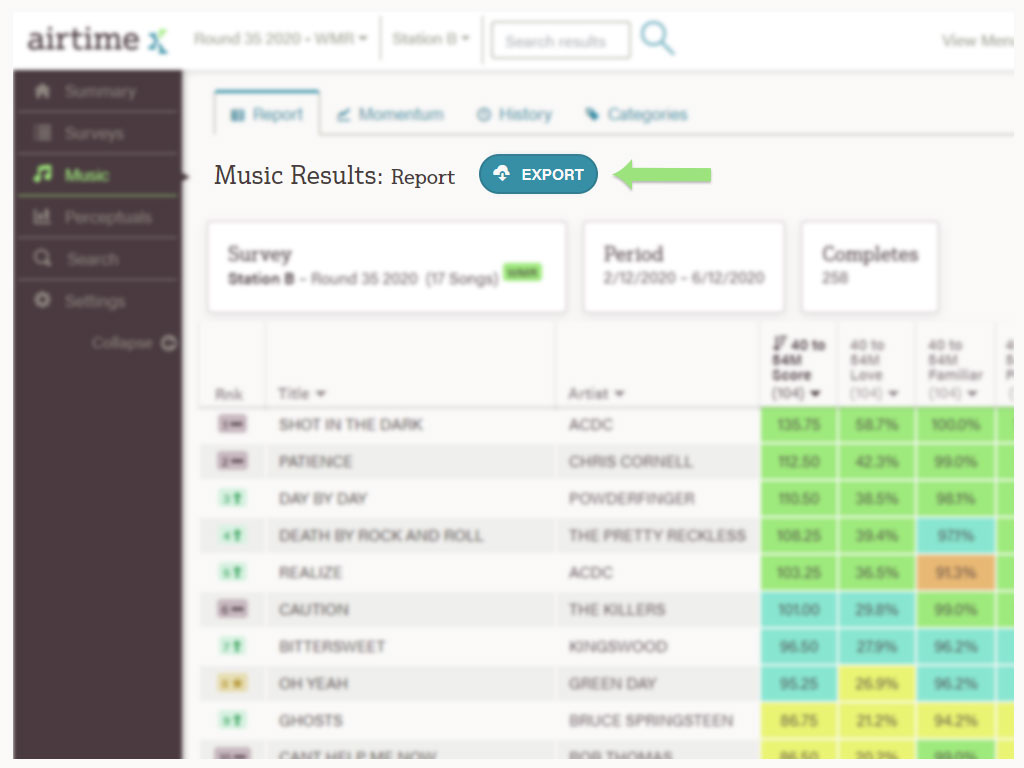
An Excel workbook (.xlxs) file will download to your device.
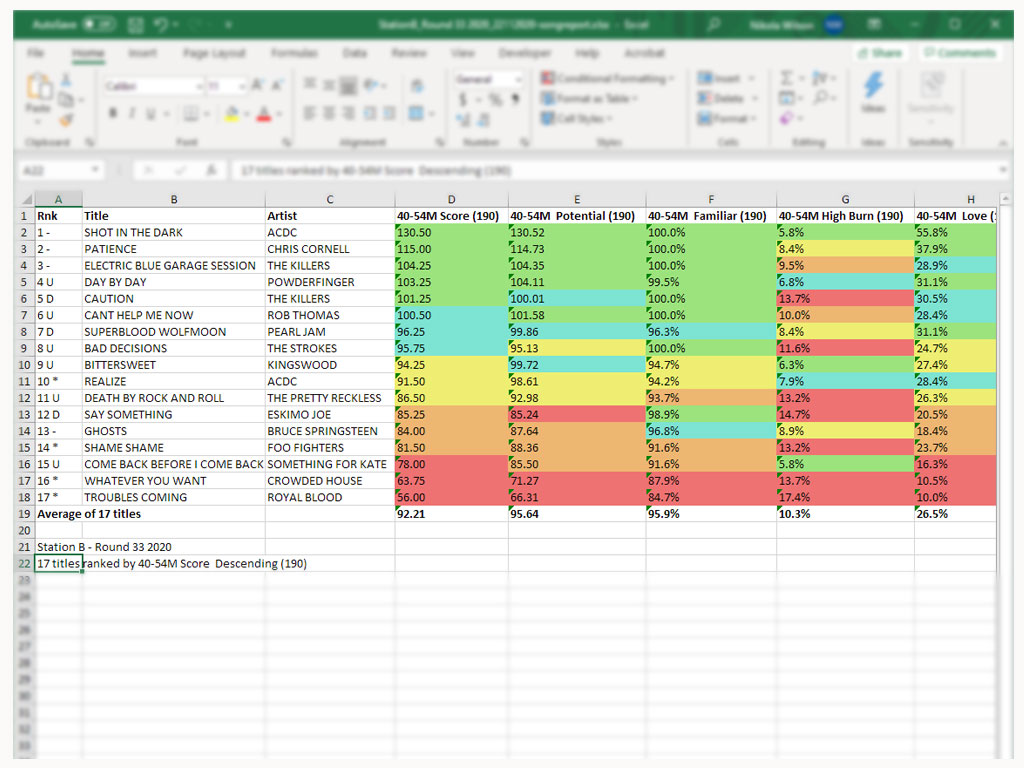
The excel file exports in the same layout as the currently selected Report View and if any column rules and sorting is applied.
Exporting results is currently only available from the Music Report page.
How to view historical data
The quick way
Navigate to the Surveys page.
Scroll down to the survey you wish to view.
Select either View Music or View Questions.
A little more detail
Navigate to the Surveys page where you will see your station(s) available and archived surveys.
By default, this page sorts by End Date. You can change the sort order by selecting the column header.
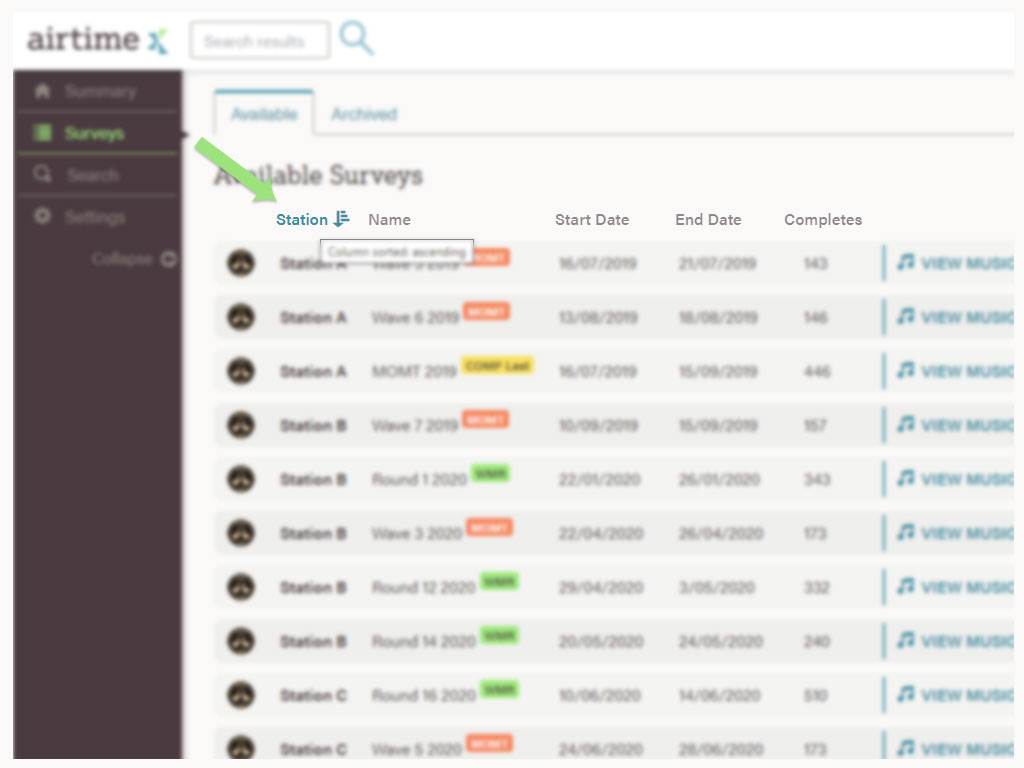
Each survey includes a summary such as name, survey type (see Glossary), survey period, and completes.
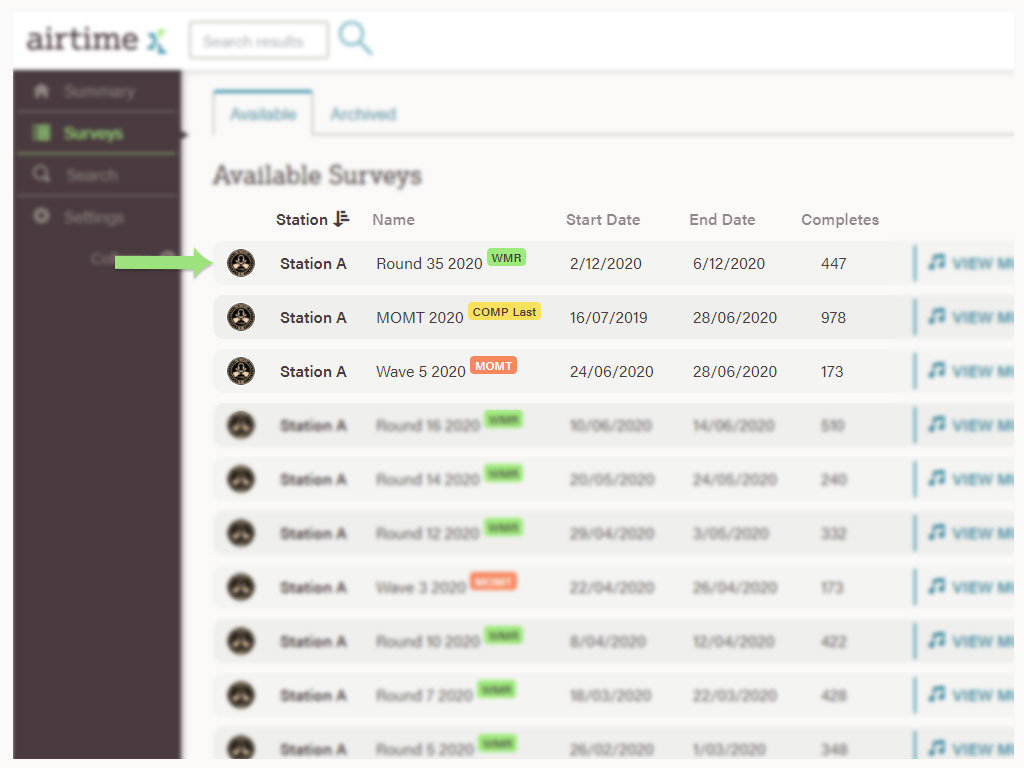
Scroll through all available surveys and choose View Music or View Questions for the corresponding survey.
If your desired survey is not available, it may be under the Archived tab (located next to the Available tab). Archived surveys are only visible and accessible from this page. They do not appear on the Summary page or the Select Survey dropdown list. They do not affect Previous Rank or Previous Test Date columns on the Music Report page. And they do not appear on the Momentum page.
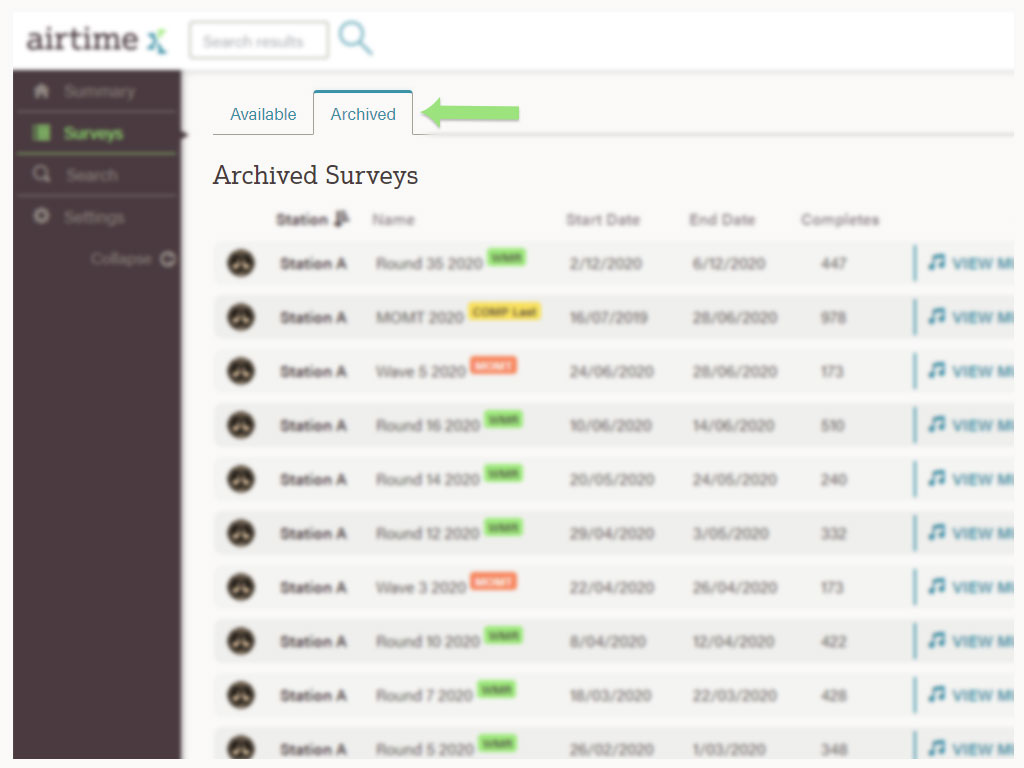
If you need a survey to be unarchived, contact SCAR Content Team or Xtra Insights.
How to view Music Momentum
The quick way
Select View Music button for the desired survey
From the Music Report page, navigate to the Momentum page by either:
- Selecting the Momentum tab, or
- Selecting the graph icon button in the specific song row.
A little more detail
From the Music Report page, selecting the Momentum tab will take you directly to the Momentum page, where the songs will be displayed from highest to lowest score.
Alternatively, you can view the momentum for an individual song by selecting the graph icon button for the corresponding song.
You can also use the Search bar (see Searching Airtime X) to see a list of every survey a song has been tested in.
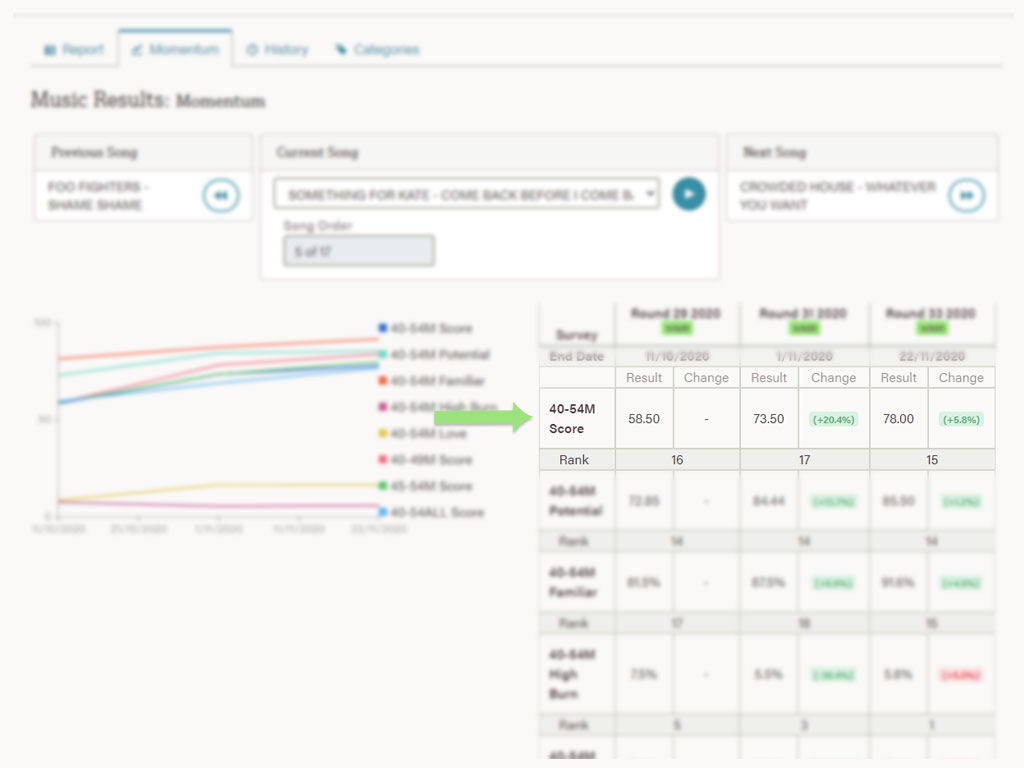
The Momentum tab will display survey data in both a table and graph format, based on the Report View (see How to change your report view). And will only display previous survey data for a song within Momentum Period (See Glossary).
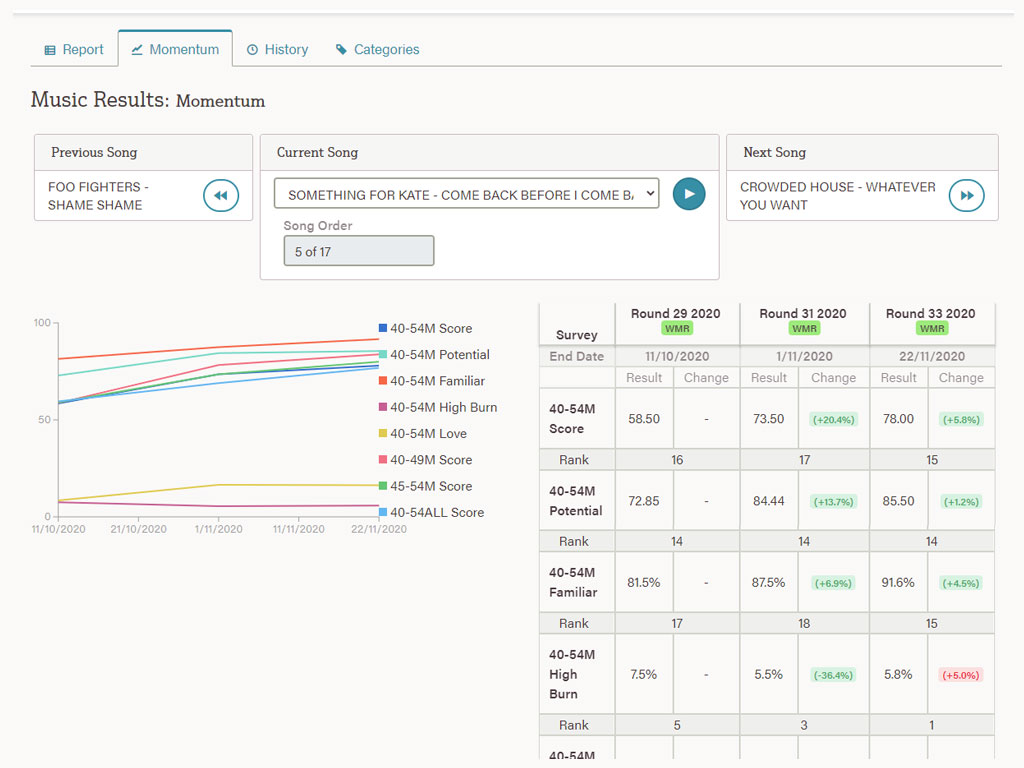
The table will also display the rank and percentage change for each report column across the previous surveys.
Select the column label in the graph to hide it so you can focus on key filters.

Momentum data can only be viewed across the same survey types (see Glossary):
E.G. Songs can be trended across WMR surveys, however, if the same song has also been tested in a MOMT, it will not be displayed as part of the WMR song momentum.
Data from archived surveys will not appear in the Momentum tab (see How to view historical data).
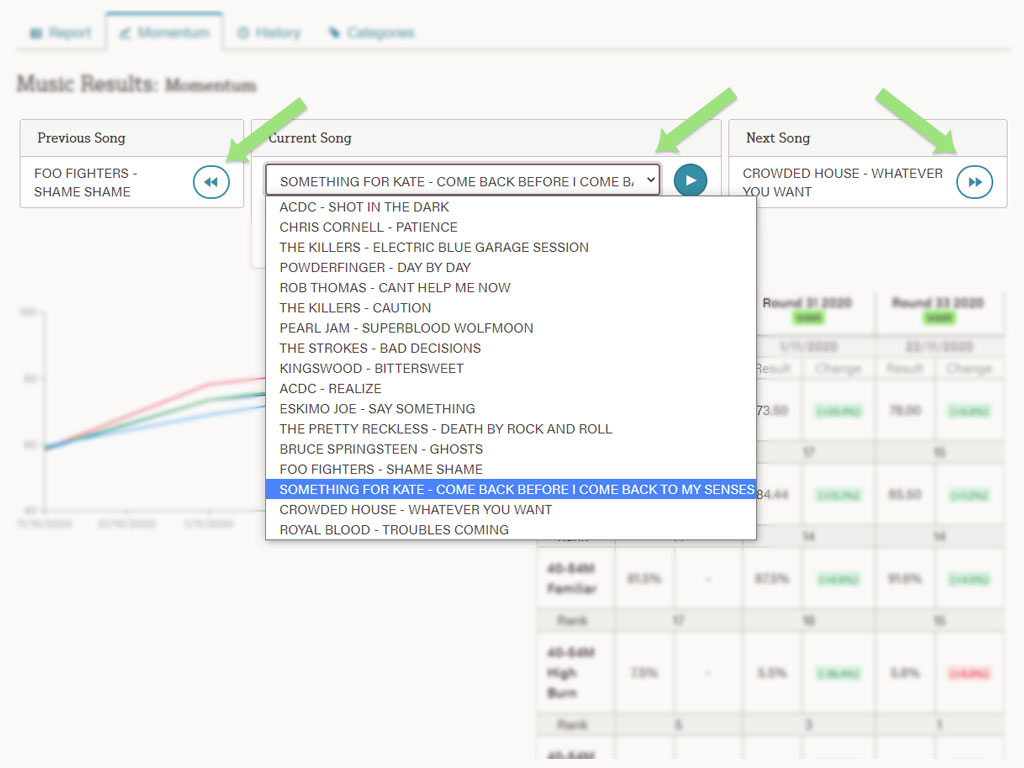
You can navigate to the next or previous song by using the respective buttons, or from the Current Song section, select the song you want from the dropdown.
Searching Airtime X
The quick way
Select the search tab from the left hand or top navigation.
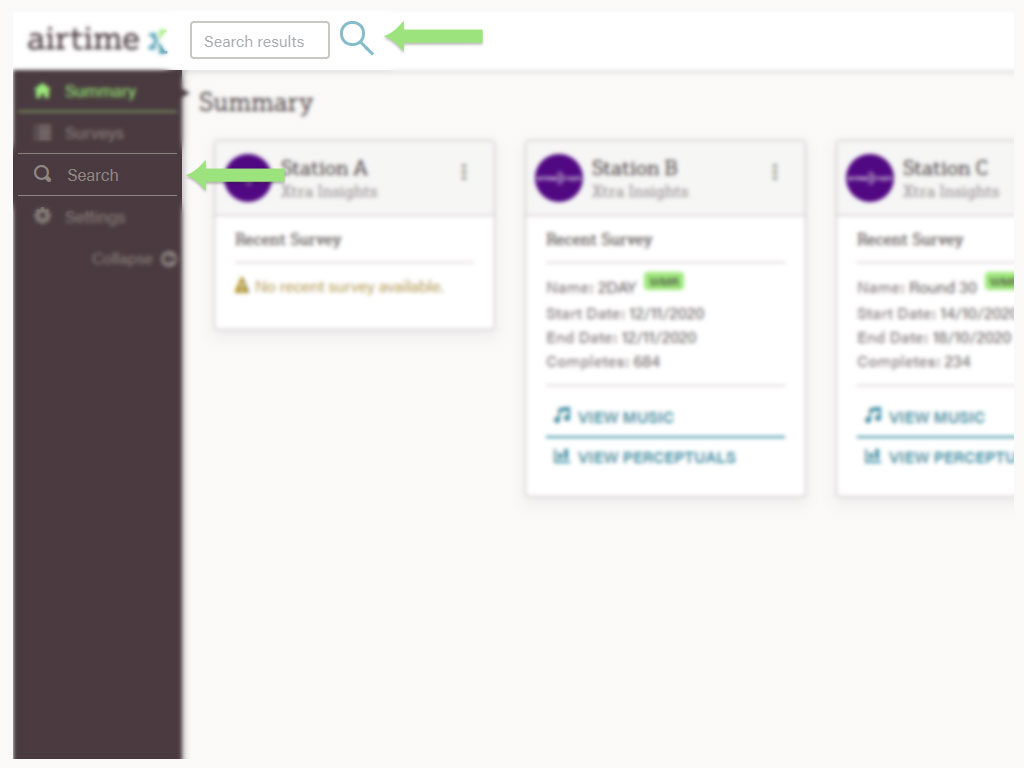
Type your query into the search bar.
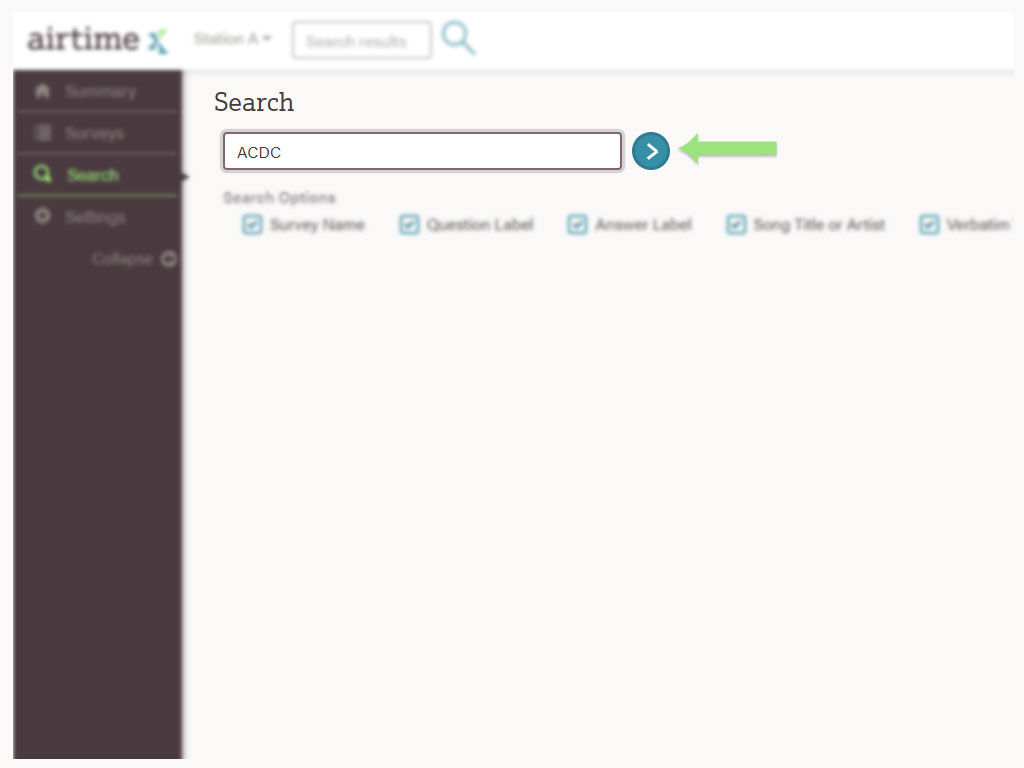
Hit enter.
A little more detail
The search function allows you to scan for numerous factors relating to surveys for a specific station, including survey name, question label, answer label, song title or artist, and verbatim text. Uncheck any of these options to speed up your search.
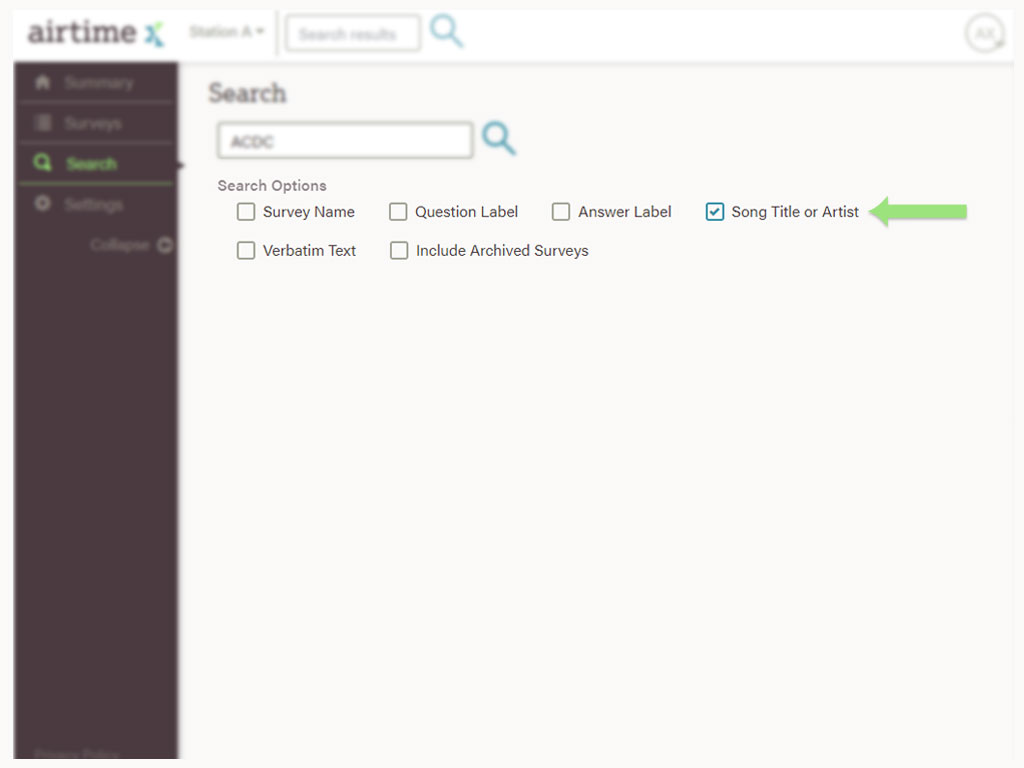
By default, the search function will only search surveys that are unarchived, however, you can choose to include archived surveys in your search.
Each search criteria can help you:
- Survey Name: Quickly find a specific survey based on its name.
- Question label: Find every survey that includes a specific word or phrase based on the question label.
- Answer label: Find every survey with a specific word or phrase based on the answer label. This only applies to single or multiple answer question types.
- Song Title or Artist: Find all surveys that reference a specific song title or artist.
E.G. Search 'King' and the search will show any title/artist that has any element of 'king' in it - Looking For Me or Kings and Queens (title) or Diana King (artist). - Verbatim text: Find all surveys with a specific answer based on a written response to an open-ended question.
Question Label, Answer Label, and Verbatim Text search results will allow you to navigate to the Questions page.
Song Title or Artist search results will redirect you to the Music Momentum page for the specific song.
Survey Name search results will redirect you to either Music Results page or Questions page.
Station Settings
Understanding Filters
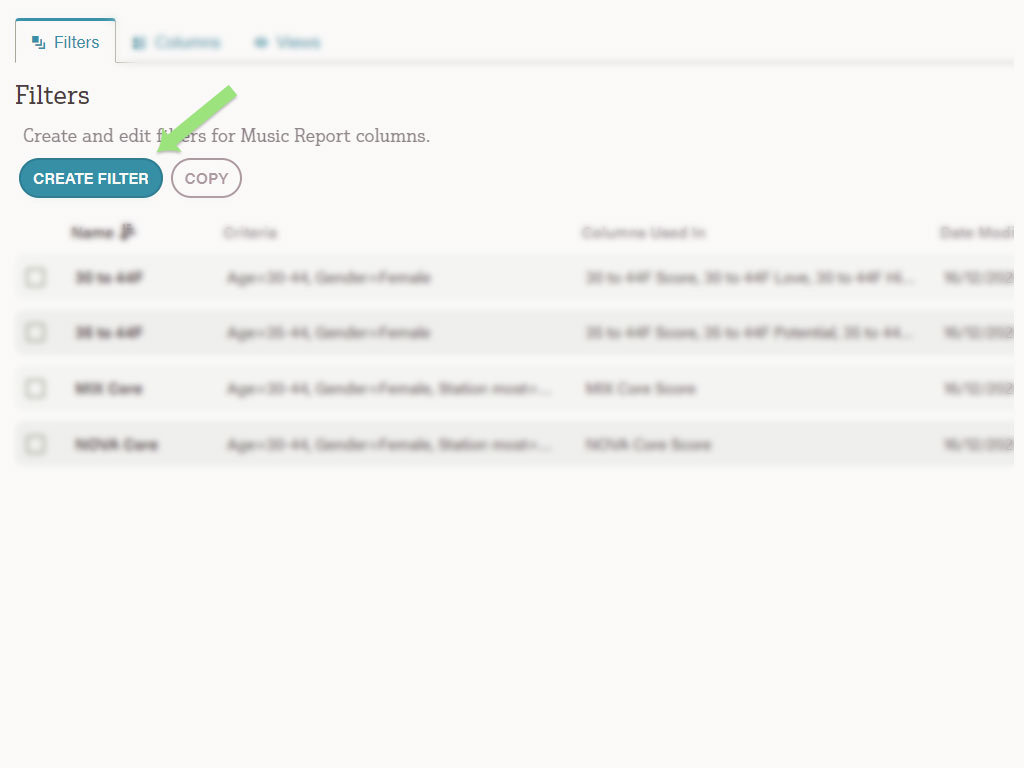
Filters are used to build Dynamic columns (see Glossary) for the Music Report. To create, copy, edit or delete filters, select Settings from the left hand navigation and then Filters from the top menu. NB: You need to be a Client to make changes (see User Roles).
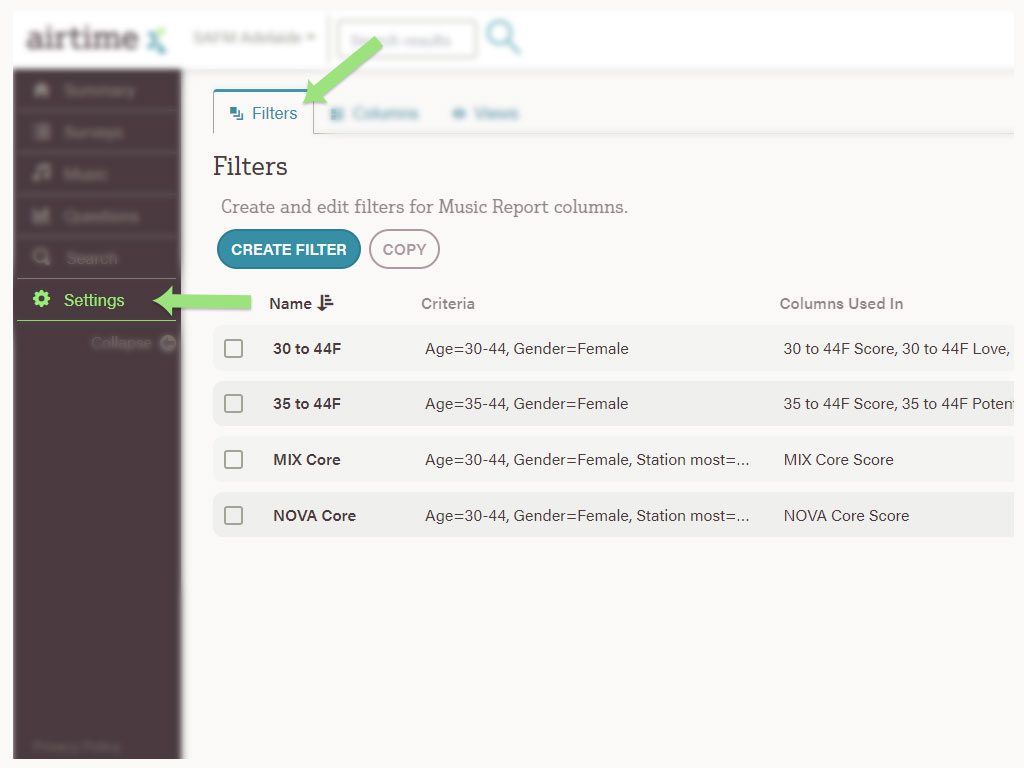
For quick access from the Music Report page you can also select Filters from the top right hand navigation.
To build a new filter select Create Filter. Filters can be made from any single answer or multiple choice question that was included in the survey.
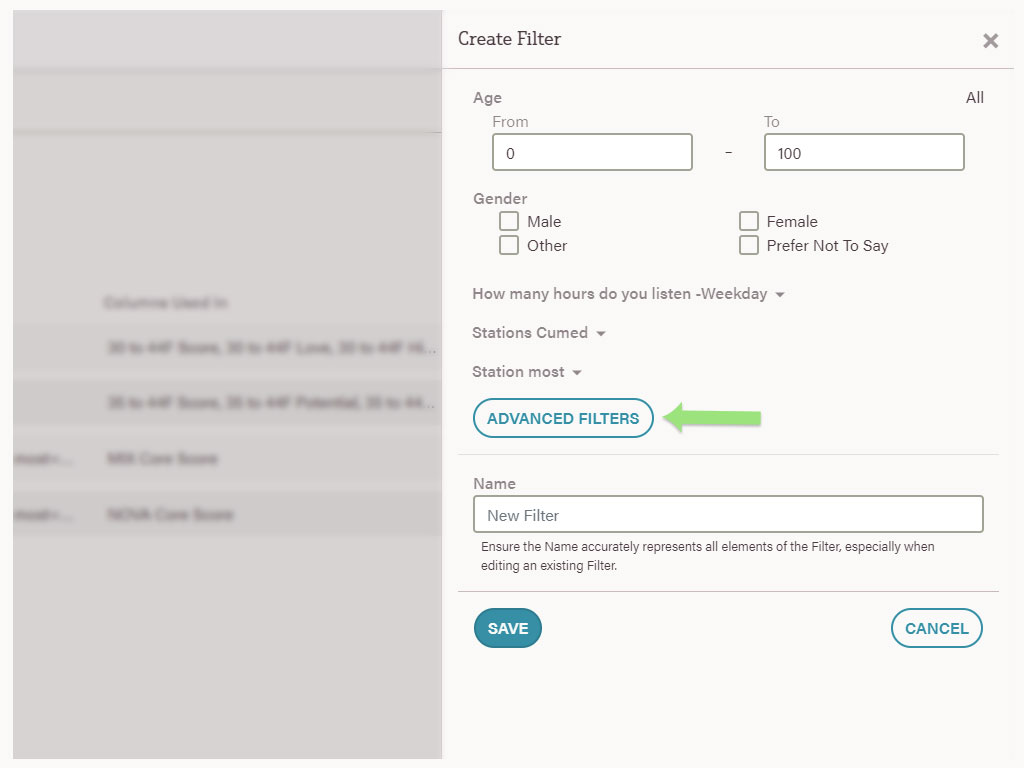
Pick from the default registration questions that are included in most surveys: Age, Gender, Time Spent Listening, Stations Cume and Station Listened to Most. Any additional questions included in the survey can be found under Advanced Filters.
To build a filter, select the answer checkbox from the questions provided. There is no limit to the combination of questions and answers that can be used. Keep in mind the more answers you select, the smaller your sample size will be. NB: Every answer you add to the filter functions like an And. At present there is no Or function.
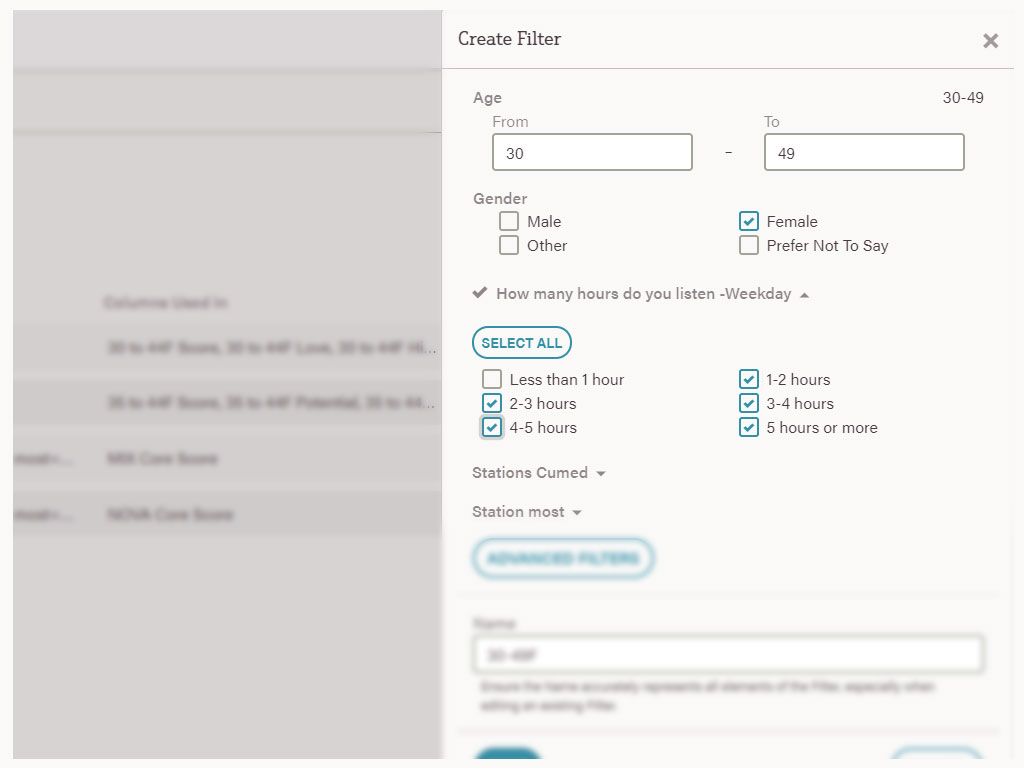
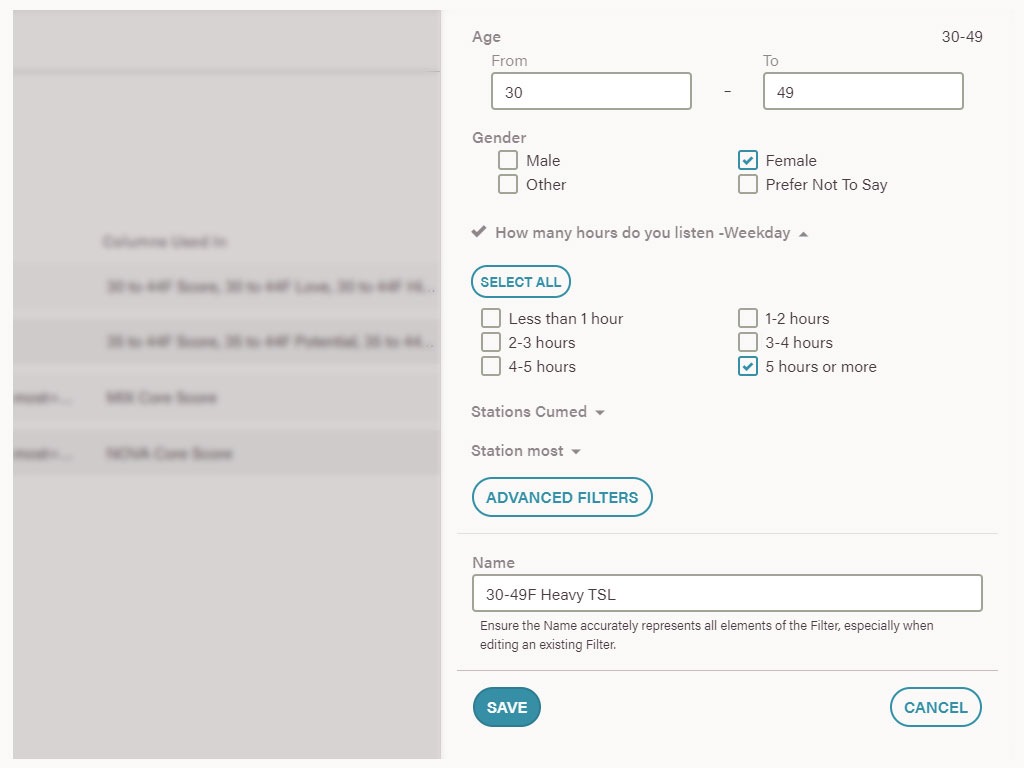
If you have selected the Age or Gender question, you will notice a Name has been generated for you. Ensure you give the filter a descriptive name based on the answers selected. Hit Save. NB: You cannot create a filter with the same name as an existing filter. Any filter you create will be visible to all users.
To edit an existing filter, select the pencil icon in the row of the filter you wish to modify. Follow the instructions above. NB: If that filter has already been used to build a column, any change you make may have implications on the results you see in the Music Report. In which case, it might be safer to Copy an existing filter by selecting the filter's checkbox and then the Copy button.
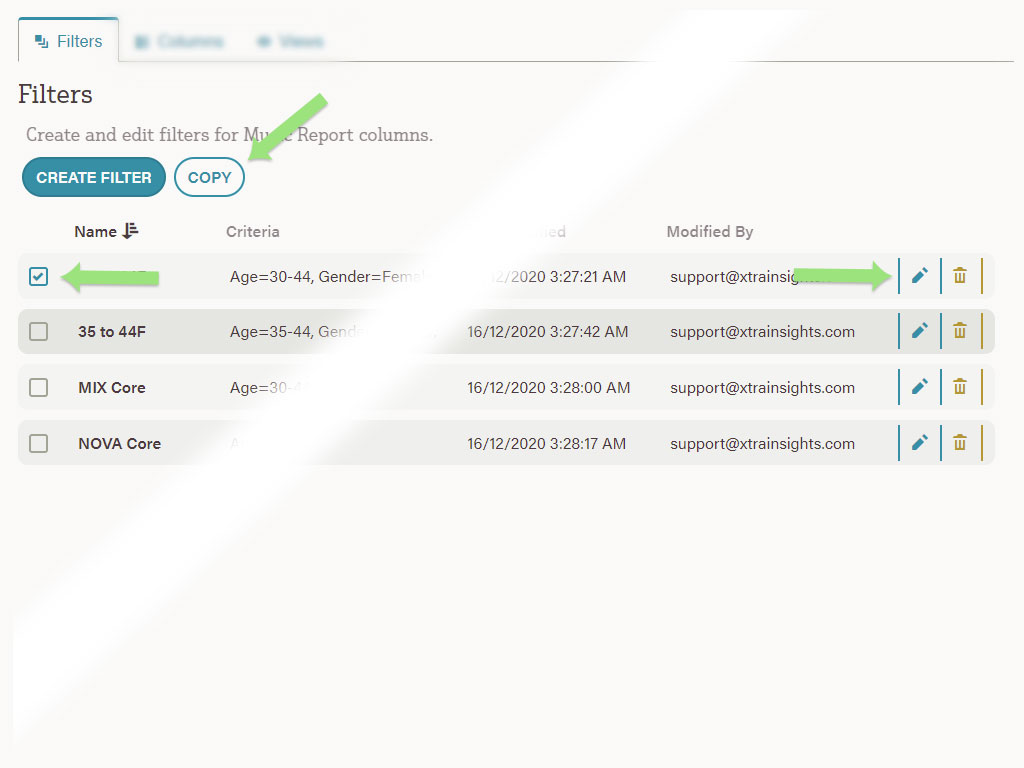
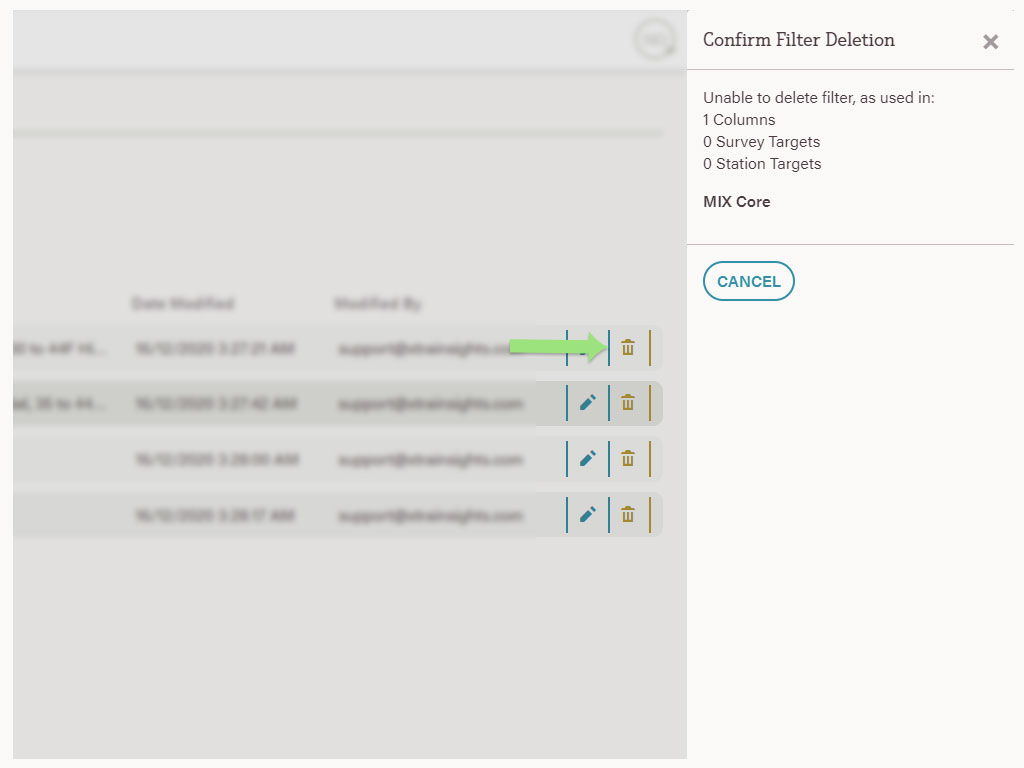
You can delete a filter by selecting the trash icon in the row of the desired filter. However, if that filter is currently being used in a column, it cannot be deleted. You need to remove that column from the report view (see Editing your report view) before the filter can be deleted. NB: Once a filter is deleted, it cannot be recovered.
Understanding Columns
Columns are used to build a report View (see Understanding Views). To view all columns for a station, select Settings from the left hand navigation and then Columns from the top menu. NB: At present you cannot make changes to columns from this page see Editing your report view instead.
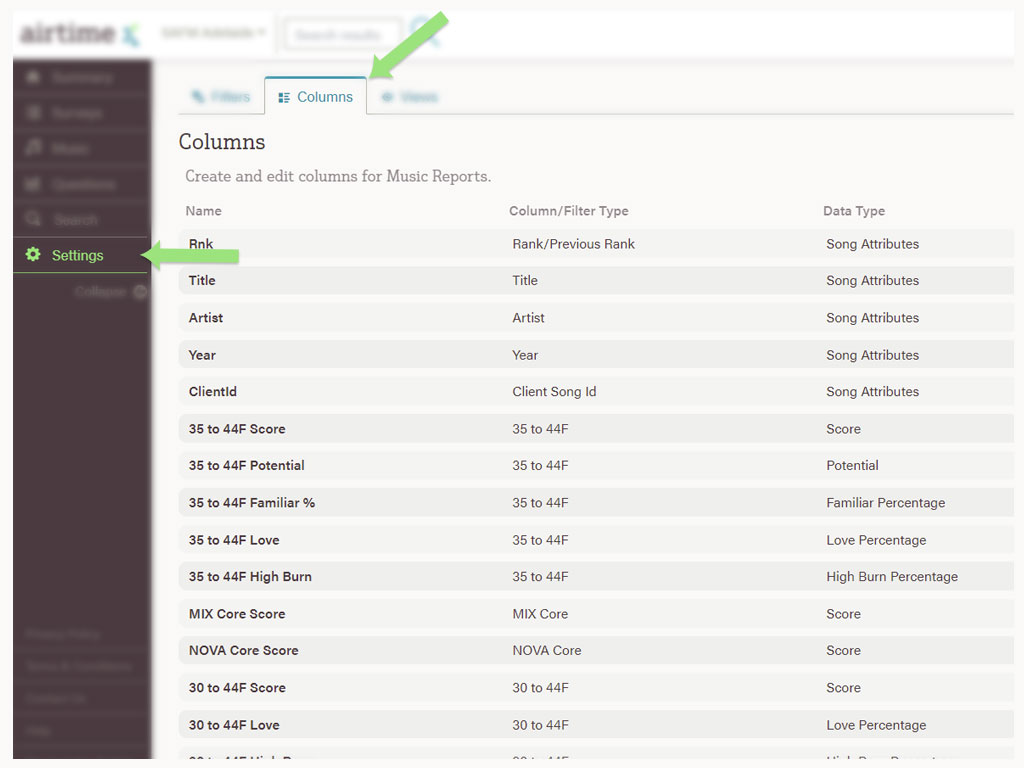
For more information on column types, check out the Glossary.
Understanding Views
Views are used to display your results on the Music Reports pages. You can view, copy, edit and delete all views for a station by selecting Settings from the left hand navigation, then Views from the top menu. NB: You need to be a Client to make changes (see User Roles).
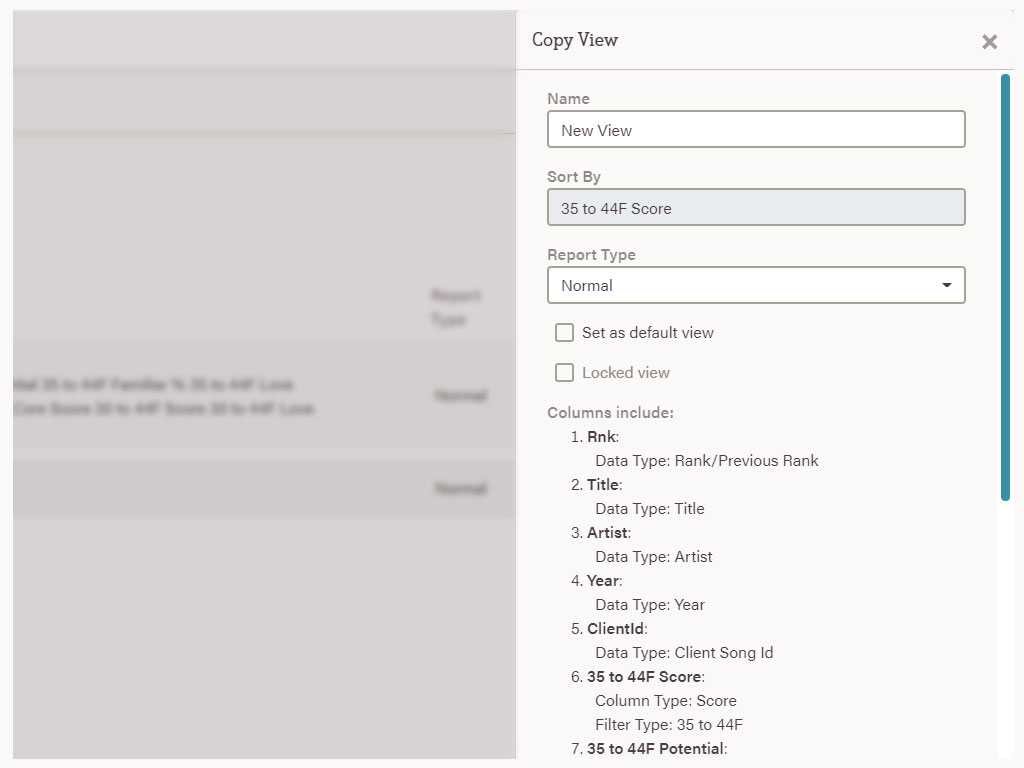
To create a new view, it's best to follow the steps listed in Editing your report view. To copy an existing view, select the view's checkbox and then the Copy button.
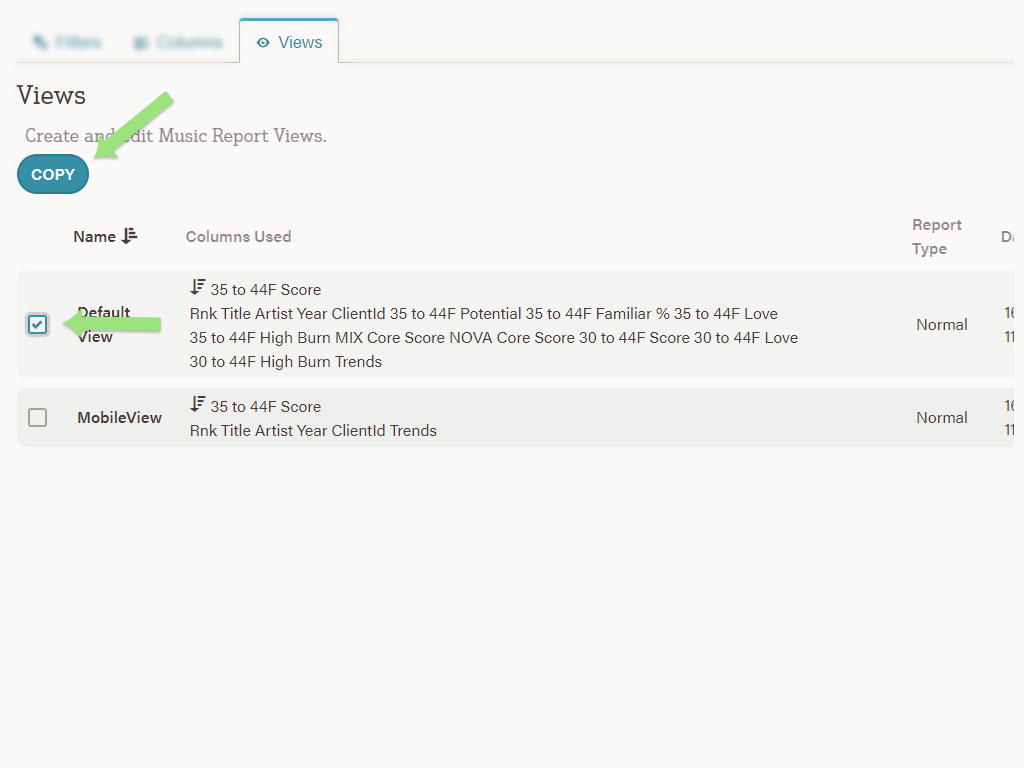
You can then give the view a new name, change the Report Type (check out the Glossary), set it as the stations' default view and even lock it. However, only Importers have the ability to edit a locked view (see User Roles). Hit Save. NB: At present you cannot make changes to columns from this page see Editing your report view instead.
To edit an existing view, select the pencil icon in the row of the view you wish to modify. Follow the instructions above.

To delete an existing view, select the trash icon in the row of the view you wish to remove. NB: Once a view is deleted, it cannot be recovered.
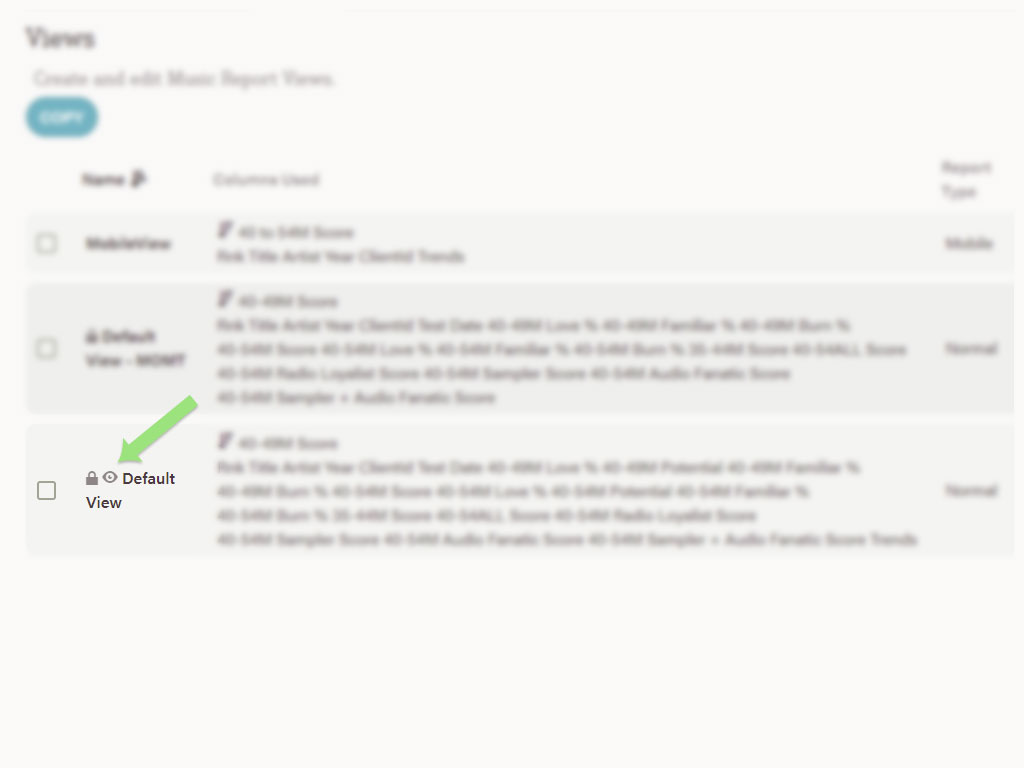
You can see which view has been set as the station default (as indicated by the eye icon) and which views have been locked (as indicated by the lock icon). NB: You can only have one default view per station.
User roles
Viewer
View and export rights only. Viewers can view all processed surveys, filters, columns, categories, and report views, for your station(s). However, you cannot make any changes. You need to contact SCAR Content Team or Xtra Insights to request any edits.
Client
Clients have the same rights as a Viewer but with more control over what you can do. You can view and edit all processed surveys, filters, columns, categories, and report views for your station(s).
Importer
Importers can do everything a Client can, as well as being able to see unprocessed surveys. You also have the ability to import survey results for your station(s).